瑞吉外卖
准备工作
建表
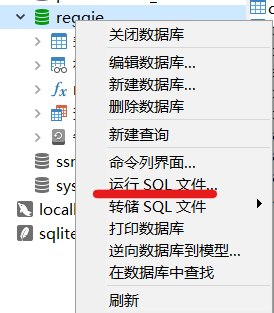
方式一:通过数据库图形软件直接导入sql文件
点击运行sql文件后弹框,选择本地的sql文件即可
方式二:通过sql命令行工具进行
1
2
3
4
5
6
7
8
9
10
11
12
13
14
15
16
17
18
19
20
21
22
23//创建数据库
mysql> create database reggie character set utf8mb4;
//展示所有数据库
mysql> show databases;
+--------------------+
| Database |
+--------------------+
| information_schema |
| mysql |
| performance_schema |
| reggie |
| ssm |
| sys |
+--------------------+
6 rows in set (0.00 sec)
//使用指定数据库
mysql> use reggie
Database changed
//导入预先的sql文件(注意,文件路径不能包含中文)
mysql> source D:\CodeTools\03.Resource\db_reggie.sql
创建SpringBoot的工程,勾选Spring Web,MySql,在
pom.xml中导入druid,lombok和MyBatisPlus坐标1
2
3
4
5
6
7
8
9
10
11
12
13
14
15
16<dependency>
<groupId>com.baomidou</groupId>
<artifactId>mybatis-plus-boot-starter</artifactId>
<version>3.4.2</version>
</dependency>
<dependency>
<groupId>com.alibaba</groupId>
<artifactId>druid-spring-boot-starter</artifactId>
<version>1.2.6</version>
</dependency>
<dependency>
<groupId>org.projectlombok</groupId>
<artifactId>lombok</artifactId>
</dependency>导入前端资源
直接放在
resources/static目录下如果放在
resources下,需要配置资源映射config.WebMvcConfig.java1
2
3
4
5
6
7
8
9
10
public class WebMvcConfig extends WebMvcConfigurationSupport {
protected void addResourceHandlers(ResourceHandlerRegistry registry) {
log.info("开始进行静态资源映射...");
registry.addResourceHandler("/backend/**").addResourceLocations("classpath:/backend/");
registry.addResourceHandler("/front/**").addResourceLocations("classpath:/front/");
}
}
完成配置文件
application.yml,配置端口和数据库,驼峰映射和主键策略1
2
3
4
5
6
7
8
9
10
11
12
13
14
15
16
17server:
port: 8080
spring:
datasource:
druid:
username: root
password: wzy123
driver-class-name: com.mysql.cj.jdbc.Driver
url: jdbc:mysql://localhost:3306/reggie?serverTimezone=UTC
mybatis-plus:
configuration:
log-impl: org.apache.ibatis.logging.stdout.StdOutImpl # 日志
map-underscore-to-camel-case: true # 将表名和字段名中下划线去掉,按照驼峰命名规则与属性名映射
global-config:
db-config:
id-type: assign_id
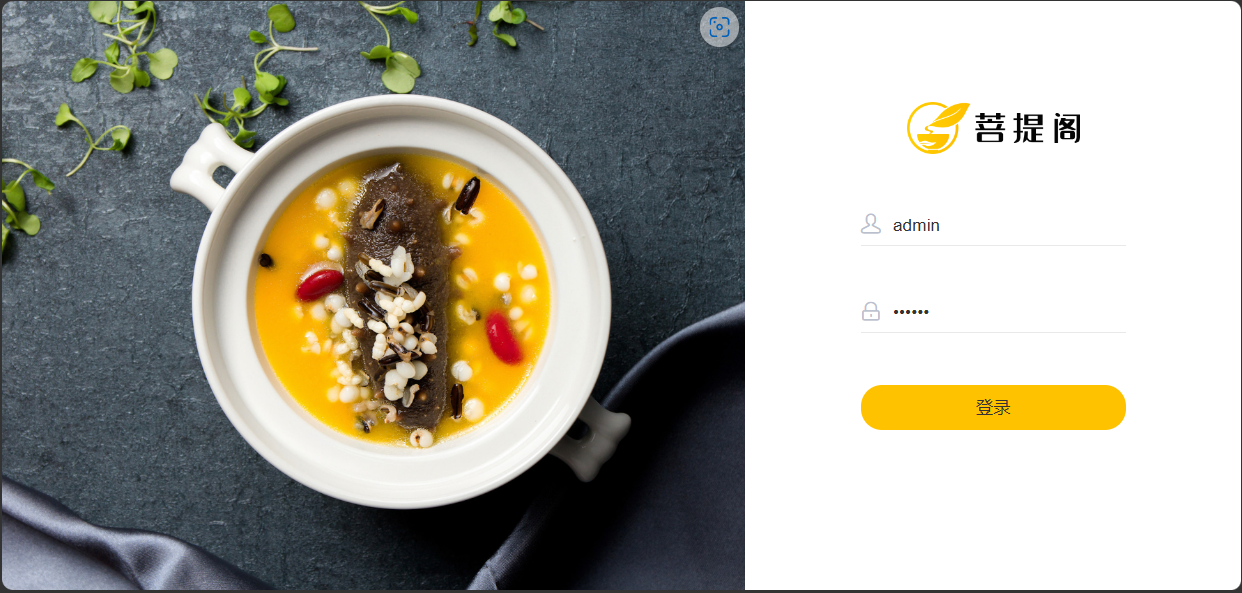
后台系统登录功能
登录测试
目前数据库中只有一条管理者信息,username为admin,password为123456(数据库中显示不一致是因为经过了MD5加密)
浏览器中输http://localhost:8080/backend/page/login/login.html即可访问静态页面
login.html
1 | methods: { |
注意这里的res,发现其有code、data、msg属性,需要对应后续R.java的内容
logout
1 | logout() { |
进行了优化,退出账户时弹窗确认
其中loginApi和logoutApi内容为:
1 | function loginApi(data) { |
创建对应的实体类
对应数据库中employee表创建实体类,这里创建entity包,等同于以前使用的pojo包
entity.Employee.java
1 | //lombok |
注意,这里属性有idNumber,而表中为id_number,这就用到了前面配置的驼峰映射
创建对应Service和Mapper
注意,这里的
BaseMapper、IService、ServiceImpl都是MP的功能
mapper.EmployeeMapper
声明Mapper注解,并且继承
BaseMapper
1 |
|
service.EmployeeService
继承
IService
1 | public interface EmployeeService extends IService<Employee> { |
service.impl.EmployeeServiceImpl
声明Service注解,继承
ServiceImpl(传入mapper和entity泛型),实现EmployeeService接口
1 |
|
统一封装结果
这一步的作用主要是将返回结果(数据库信息或者异常信息)封装成统一的格式,便于前端人员使用。
common.R
1 |
|
这里对应了前面登录测试中所说res的三个属性
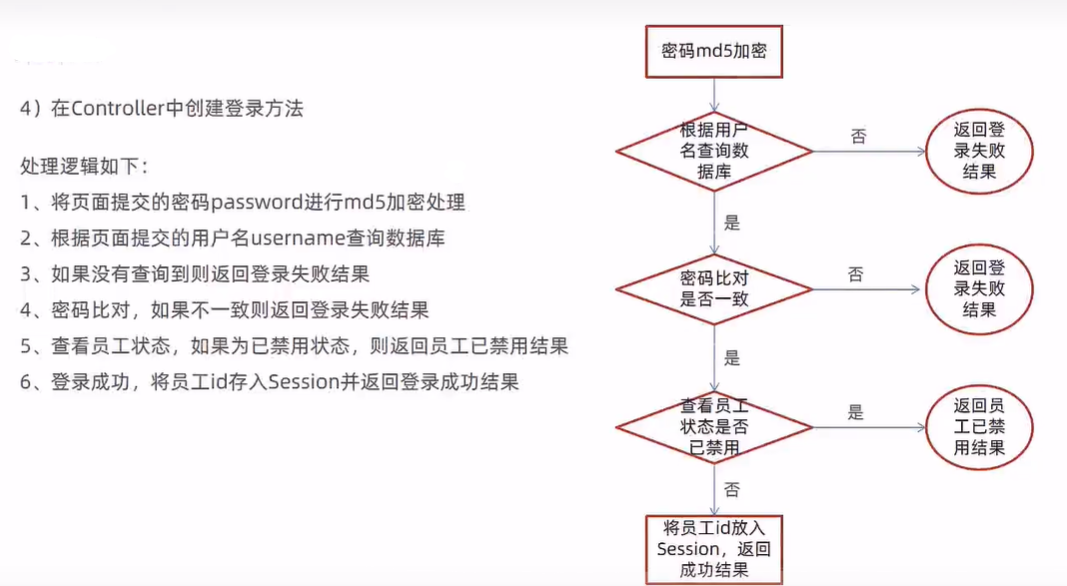
创建对应Controller
登录逻辑:
点击登录按钮会发送请求,请求地址为
/employee/login,请求方式为post。这时在后端受到请求后需要做如下判断:
登出逻辑:
用户点击页面退出按钮,发送请求,请求地址为
/employee/logout,请求方式为post。在controller的logout方法中需要完成:- 清除session的用户id
- 返回登录页面
controller.EmployeeController
1 |
|
@RequestBody:主要用于接收前端传递给后端的json字符串。这里使用Employee接收相同的字段HttpServletRequest:如果登录成功,将员工对应的id存到session一份,这样想获取一份登录用户的信息就可以随时获取出来
注意:单步调试时,会因时间过长而响应超时,这时可以在backend/js/request.js中修改timeout属性值,改完之后清除页面的缓存
完善登录功能
问题分析:
之前的登录功能,如果不登录直接访问 http://localhost/backend/index.html 也可以正常访问,这显然是不合理的。我们希望看到的效果是,只有登录成功才能看到页面,未登录状态则跳转到登录页面。那么具体改如何实现呢?
使用过滤器或拦截器,在过滤器或拦截器中判断用户是否登录,然后在选择是否跳转到对应页面
整体流程:
测试filter拦截路径
filter.loginCheckFilter
在这个过滤器上添加
@Componet让spring扫描,或者在启动类添加@ServletComponentScan注解后,会自动将带有@WebFilter的注解进行注入
1 |
|
此时访问index页面,查看日志
1 | 2023-06-11 23:24:57.211 INFO 8800 : 拦截到的URI:/backend/plugins/axios/axios.min.map |
编写Filter逻辑
导一下fastjson的坐标
1
2
3
4
5<dependency>
<groupId>com.alibaba</groupId>
<artifactId>fastjson</artifactId>
<version>1.2.62</version>
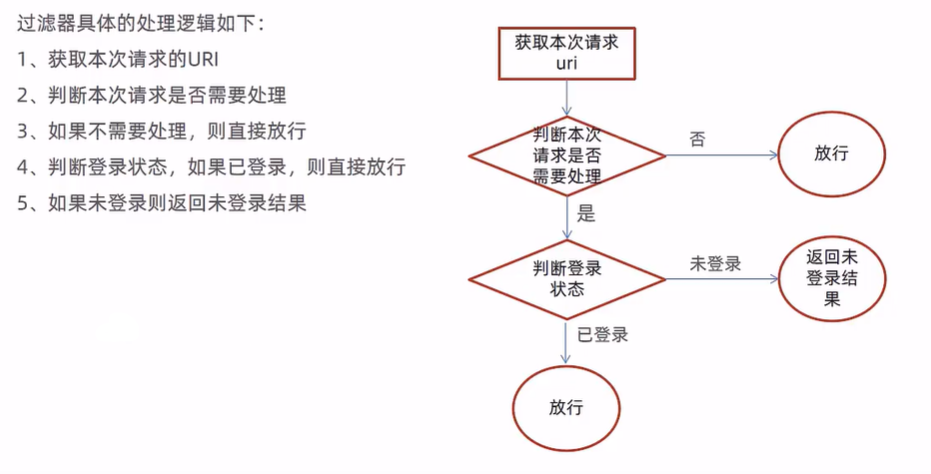
</dependency>获取本次请求的URI
1
2
3
4
5
6
7
8
9//获取本次请求的URI
String uri = request.getRequestURI();
//定义不需要被拦截的请求
String[] urls = new String[]{
"/employee/login.html",
"/employee/logout.html",
"/backend/**",
"/front/**"
};判断本次请求是否需要处理
PathMatcher路径匹配器1
2
3
4
5
6
7
8
9
10
11//路径匹配器
public static final AntPathMatcher PATH_MATCHER = new AntPathMatcher();
private boolean check(String[] urls, String uri) {
for (String url : urls) {
boolean match = PATH_MATCHER.match(url, uri);
if (match)
return true;
}
return false;
}如果不需要处理,则直接放行
1
2
3
4if (check) {
filterChain.doFilter(request, response);
return;
}判断登录状态,如果已登录,则直接放行
1
2
3
4
5//我们当初存的session是employee,所以这里就拿它判断
if (request.getSession().getAttribute("employee") != null) {
filterChain.doFilter(request,response);
return;
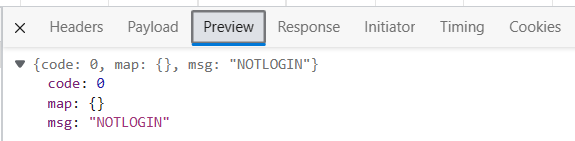
}如果未登录则返回未登录结果
1
response.getWriter().write(JSON.toJSONString(R.error("NOTLOGIN")));
当符合未登录状态的条件时,会自动重定向到登录页面。JS代码如下
1
2
3
4
5
6
7
8
9
10// 响应拦截器
service.interceptors.response.use(res => {
if (res.data.code === 0 && res.data.msg === 'NOTLOGIN') {// 返回登录页面
console.log('---/backend/page/login/login.html---')
localStorage.removeItem('userInfo')
window.top.location.href = '/backend/page/login/login.html'
} else {
return res.data
}
}完整代码
1
2
3
4
5
6
7
8
9
10
11
12
13
14
15
16
17
18
19
20
21
22
23
24
25
26
27
28
29
30
31
32
33
34
35
36
37
38
39
40
41
42
43
44
45
46
47
48
49
50
51
52
53
54
55
56
57
58
59
60
61
62
63
public class LoginCheckFilter implements Filter {
//路径匹配
public static final AntPathMatcher PATH_MATCHER = new AntPathMatcher();
public void doFilter(ServletRequest servletRequest, ServletResponse servletResponse, FilterChain filterChain) throws IOException, ServletException {
//强转
HttpServletRequest request = (HttpServletRequest) servletRequest;
HttpServletResponse response = (HttpServletResponse) servletResponse;
//1.获取本次请求的URI
String requestURI = request.getRequestURI();
log.info("拦截到请求:{}",requestURI);
//定义不需要处理的请求
String[] urls = new String[]{
"/employee/login",
"/employee/logout",
"/backend/**", //静态资源
"/front/**"
};
//2.判断本次请求是否需要处理
boolean check = check(urls, requestURI);
//3.如果不需要处理,则直接放行
if (check) {
log.info("本次请求:{},不需要处理",requestURI);
filterChain.doFilter(request,response);
return;
}
//4.判断登录状态,如果已登录,则直接放行
if (request.getSession().getAttribute("employee") != null) {
log.info("用户已登录,id为{}",request.getSession().getAttribute("employee"));
filterChain.doFilter(request,response);
return;
}
//5.如果未登录则返回未登录结果,通过输出流方式向客户端页面响应数据
log.info("用户未登录");
log.info("用户id{}",request.getSession().getAttribute("employee"));
response.getWriter().write(JSON.toJSONString(R.error("NOTLOGIN")));
}
public boolean check(String[] urls, String requestURI){
for (String url : urls) {
boolean match = PATH_MATCHER.match(url, requestURI);
if (match) {
//匹配
return true;
}
}
//不匹配
return false;
}
}
测试跳过登录直接访问index
直接输入http://localhost:8080/backend/index.html,输入日志如下:
1 | INFO 11008 --- [nio-8080-exec-8] com.wzy.filter.LoginCheckFilter : 拦截到请求:/employee/page |
现象就是网页直接跳转到登录界面
添加员工
实现功能之前,我们先梳理一下整个执行流程
- 页面发送ajax请求,将新增员工页面中输入的数据以json的形式提交到服务端
- 服务端Controller接收页面提交的数据并调用Service将数据进行保存
- Service调用Mapper操作数据库,保存数据
流程分析
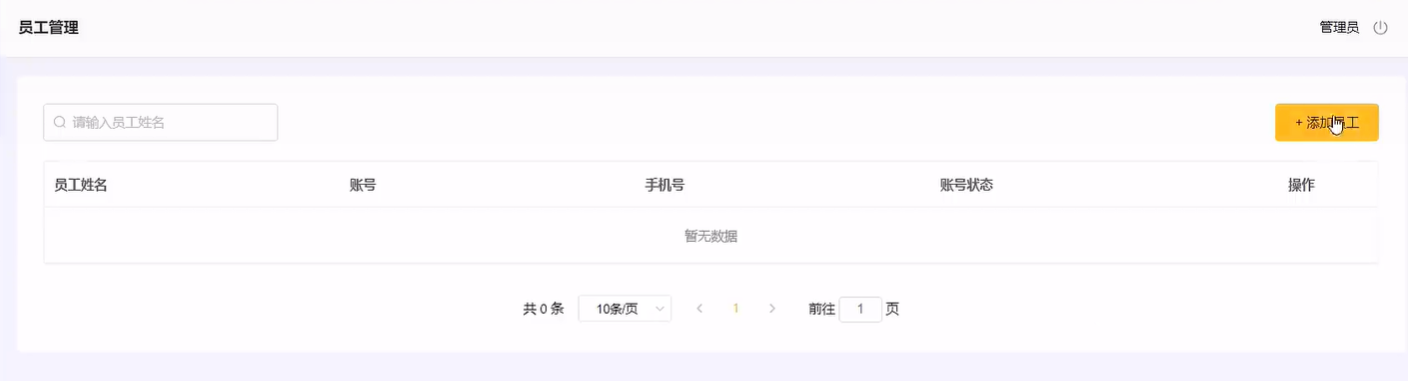
登录后会看到员工列表页面(backend/page/member/list.html),右上角有员工信息添加按钮
list.html:添加员工按钮
1 | <el-button |
点击后触发
addMemberHandle方法
list.html:addMemberHandle方法, 确认参数是add调用后menuHandle方法(在index中声明)跳转指定页面
1 | // 添加 |
此时跳转到
/backend/page/member/add.html
add.html:信息输入表单
1 | <el-form |
注意:其中点击保存按钮后会触发
submitForm函数;数据模型绑定的是ruleForm
add.html:submitForm函数, 将表单的数据封装成json对象,传递给addEmployee函数,发送添加请求
1 | submitForm (formName, st) { |
可以看出前端通过判断code属性来确定是否添加员工,所以controller返回R
即可
backend/api/member.js
1 | // 新增---添加员工 |
这就像通常的方法,使用axios传递请求给controller,进行员工添加
控制器方法
前端传来账号名、用户名、手机号、性别、身份证号信息,封装在json格式中
后端主要处理默认密码(MD5加密)、注册时间、更新时间、创建人ID和修改人ID即可
1 |
|
这时控制台可以看出使用了sql添加语句:
1 | JDBC Connection [com.mysql.cj.jdbc.ConnectionImpl@3d0f16eb] will not be managed by Spring |
注意:此时如果添加相同账号名的数据就会抛出异常,因为在建表的时候设定了unique,只能存在唯一的username
添加全局异常处理器
针对上面的问题,这里建立全局异常处理器,集中处理异常。在common包下创建一个全局异常处理类GlobalExceptionHandler,并添加exceptionHandler方法用来捕获异常,并返回结果
common/GlobalExceptionHandler.java
1 |
|
@ControllerAdvice表示处理器处理哪些类@ExceptionHandler表示处理的异常类型
如果这时输入已存在的用户名,就会弹窗“用户名已存在”,且控制台报错:
1 | ERROR 16952 --- [nio-8080-exec-5] com.wzy.common.GlobalExceptionHandler : Duplicate entry 'wzy' for key 'employee.idx_username' |
我们希望给出的错误信息为该用户名已存在,所以我们就需要对错误信息来进行判断,如果错误信息中包含Duplicate entry,则说明有条目是重复的,所以用split()方法来对错误信息切片,取出重复的username,采用字符串拼接的方式,告知该用户已经存在了
1 |
|
此时输入重复用户就会报错:

员工信息分页查询
梳理一下整个程序的执行过程:
- 页面发送ajax请求,将分页查询参数(page、pageSize、name)提交到服务
- 服务端Controller接收页面提交的数据并调用Service查询数据
- Service调用Mapper操作数据库,查询分页数据
- Controller将查询到的分页数据响应给页面
- 页面接收到分页数据并通过ElementUI的Table组件展示到页面上
前端代码分析
当进入到员工页面后,会发现前端发送请求(F12查看Network):

当登录后进入到员工页面,会自动展示员工信息,这时因为vue的created方法自动调用的缘故:
backend/page/member/list.html
1 | created() { |
其中init函数中封装了分页查询的相关信息,并且是json格式,这里和请求url对应是设置了全局的get请求拦截器,将json内容转成拼接形式;getMemberList函数传递参数给后端处理
backend/api/member.js:getMemberList函数
1 | function getMemberList (params) { |
backend/page/member/list.html
1 | await getMemberList(params).then(res => { |
后端处理后返回数据,函数接收后判断code是否正常,然后封装到tableData(E-UI的组件)中展示
到这里我们可以看出,后端拦截/employee/page即可,接收分页相关数据
后端实现
配置MyBatisPlus分页插件
config/MybatisPlusConfig.java
1 |
|
控制器方法
首先分析传给后端的数据,除了分页数据page和pageSize,还会包括条件查询的name

初步测试
1 |
|
注意,这里的Page是MP内置的类,包含前面前端页面中
res.data.records和res.data.total
这里进行初步测试,控制台输出如下,可以看出接收到了前端传来的信息
1 | INFO 2832 --- [io-8080-exec-10] com.wzy.controller.EmployeeController : page=1,pageSize=10,name=null |
完善功能
1 |
|

启用/禁用员工账号
禁用数据类型
现象:前端传给页面的status数据为Integer类型,到页面展示效果的时候显示的是已禁用或者正常
原因:前端动态获取每条数据,将其中的state属性使用三位运算符进行替换处理
1 | <el-table-column label="账号状态"> |
需求分析
- 在员工管理列表页面,可以对某个员工账号进行启用或者禁用操作。账号禁用的员工不能登录系统,启用后的员工可以正常登录。
- 需要注意,只有管理员(admin用户)可以对其他普通用户进行启用、禁用操作,所以普通用户登录系统后启用、禁用按钮不显示。
- 管理员admin登录系统可以对所有员工账号进行启用、禁用操作。
- 如果某个员工账号状态为正常,则按钮显示为“禁用”,如果员工账号状态为已禁用,则按钮显示为“启用”
按钮动态显示效果
前面说到,当登录用户为管理员时,右侧会显示对员工账号的禁用或启用操作,而普通用户则没有这一按钮。这个功能通过动态按钮实现。
- 在vue的created函数中,除了之前的init函数实现分页查询外,还有一句从localStorage中获取登录用户信息的语句,并获取其username
1 | created() { |
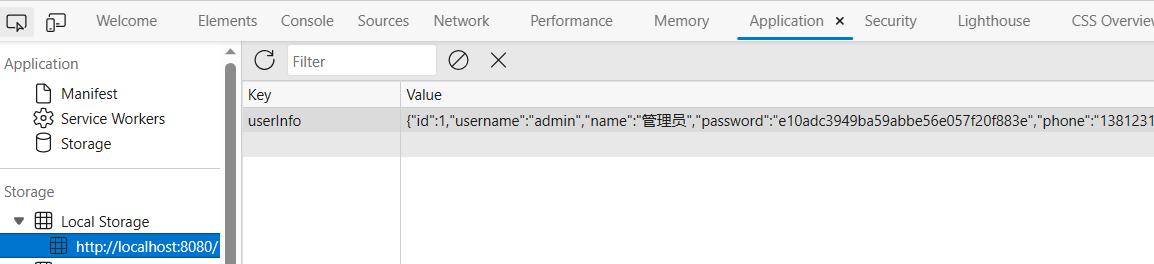
- 在login登录界面,登录成功后会将用户信息保存在localStorage中,key名为”userInfo”
1 | methods: { |
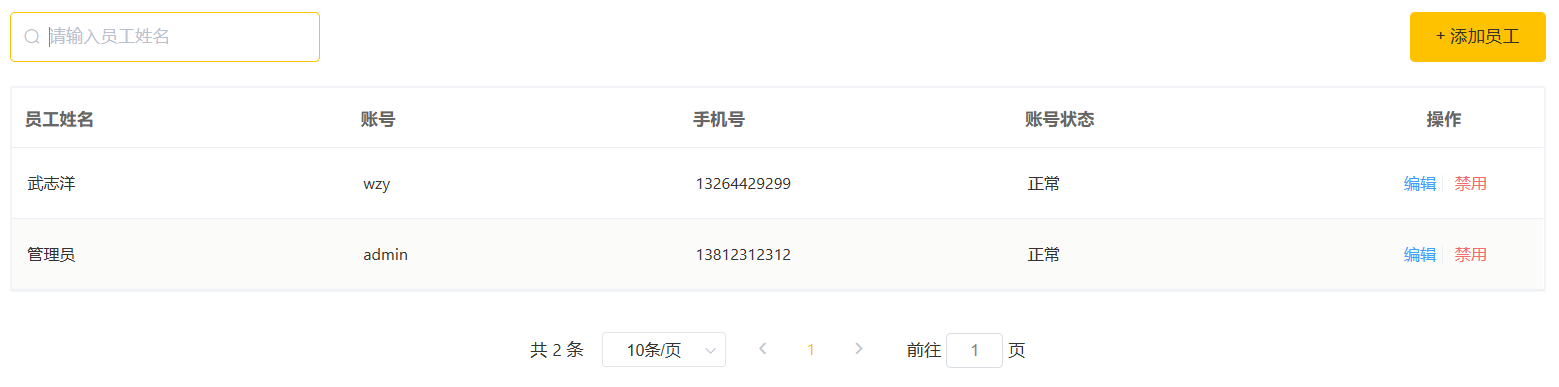
- 登录后可以看到,将登录用户的信息保存在localStorage中
- 然后这里按钮判断user是否时管理员,从而显示不同的效果
1 | <el-button |
请求执行过程
首先点击禁用按钮,F12查看请求内容
请求路径和方式
携带参数(id和status)
禁用按钮点击后会触发点击事件
statusHandle()1
2
3
4
5
6
7
8
9<el-button
type="text"
size="small"
class="delBut non"
@click="statusHandle(scope.row)"
v-if="user === 'admin'"
>
{{ scope.row.status == '1' ? '禁用' : '启用' }}
</el-button>statusHandle()1
2
3
4
5
6
7
8
9
10
11
12
13
14
15
16
17
18
19
20//状态修改
statusHandle (row) {
this.id = row.id
this.status = row.status
this.$confirm('确认调整该账号的状态?', '提示', {
'confirmButtonText': '确定',
'cancelButtonText': '取消',
'type': 'warning'
}).then(() => {
enableOrDisableEmployee({ 'id': this.id, 'status': !this.status ? 1 : 0 }).then(res => {
console.log('enableOrDisableEmployee',res)
if (String(res.code) === '1') {
this.$message.success('账号状态更改成功!')
this.handleQuery()
}
}).catch(err => {
this.$message.error('请求出错了:' + err)
})
})
},这里将每行数据拿到,然后弹窗确认,如果确认就会调用
enableOrDisableEmployee方法实现status的启用或禁用enableOrDisableEmployee()1
2
3
4
5
6
7
8// 修改---启用禁用接口
function enableOrDisableEmployee (params) {
return $axios({
url: '/employee',
method: 'put',
data: { ...params }
})
}可以看出这里发送ajax请求,将param传递给后端,后端进行数据库的修改即可
控制器方法
启用、禁用员工账号,本质上就是一个更新操作,也就是对status状态字段进行操作在Controller中创建update方法,此方法是一个通用的修改员工信息的方法
只不过现在我们的update只需要修改status,而后面我们还有修改员工其他信息的业务,根据传进来的employee
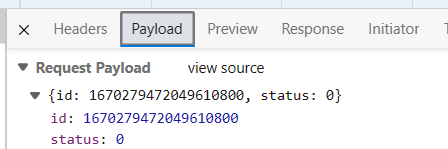
初步测试
1 |
|
输出日志:
1 | employee:Employee(id=1670279472049610800, username=null, name=null, password=null, phone=null, sex=null, idNumber=null, status=0, createTime=null, updateTime=null, createUser=null, updateUser=null) |
其中前端只传递了id和status
功能实现
1 |
|
更新:更新时间、更新用户,然后根据id更新数据库
输出效果:
点击禁用后,虽然弹出禁用成功,但是实际status并没有变化,查看输出日志发现更新数据为0,说明更新失败
1 | JDBC Connection [com.mysql.cj.jdbc.ConnectionImpl@3bb5fe38] will not be managed by Spring |
观察数据库中内容,发现二者id存在差别:数据库:1670279472049610753 VS 查询:1670279472049610800。发现二者后三位存在差异
问题的原因:
- JS对Long型数据进行处理时丢失精度(id为19位,而js处理long16位),导致提交的id和数据库中的id不一致。
如何解决这个问题?
- 我们可以在服务端给页面响应json数据时进行处理,将Long型数据统一转为String字符串
配置状态转换器
根据前面的问题,这里配置状态转换器进行转换
配置对象映射器
JacksonObjectMapper,继承ObjectMapper。基于Jackson进行java对象到json数据的转换直接粘贴在
common包下即可1
2
3
4
5
6
7
8
9
10
11
12
13
14
15
16
17
18
19
20
21
22
23
24
25
26
27
28
29
30
31
32
33
34
35
36
37
38
39
40
41
42
43
44
45
46
47
48
49
50
51import com.fasterxml.jackson.databind.DeserializationFeature;
import com.fasterxml.jackson.databind.module.SimpleModule;
import com.fasterxml.jackson.databind.ser.std.ToStringSerializer;
import com.fasterxml.jackson.datatype.jsr310.deser.LocalDateDeserializer;
import com.fasterxml.jackson.datatype.jsr310.deser.LocalDateTimeDeserializer;
import com.fasterxml.jackson.datatype.jsr310.deser.LocalTimeDeserializer;
import com.fasterxml.jackson.datatype.jsr310.ser.LocalDateSerializer;
import com.fasterxml.jackson.datatype.jsr310.ser.LocalDateTimeSerializer;
import com.fasterxml.jackson.datatype.jsr310.ser.LocalTimeSerializer;
import java.math.BigInteger;
import java.time.LocalDate;
import java.time.LocalDateTime;
import java.time.LocalTime;
import java.time.format.DateTimeFormatter;
import static com.fasterxml.jackson.databind.DeserializationFeature.FAIL_ON_UNKNOWN_PROPERTIES;
/**
* 对象映射器:基于jackson将Java对象转为json,或者将json转为Java对象
* 将JSON解析为Java对象的过程称为 [从JSON反序列化Java对象]
* 从Java对象生成JSON的过程称为 [序列化Java对象到JSON]
*/
public class JacksonObjectMapper extends ObjectMapper {
public static final String DEFAULT_DATE_FORMAT = "yyyy-MM-dd";
public static final String DEFAULT_DATE_TIME_FORMAT = "yyyy-MM-dd HH:mm:ss";
public static final String DEFAULT_TIME_FORMAT = "HH:mm:ss";
public JacksonObjectMapper() {
super();
//收到未知属性时不报异常
this.configure(FAIL_ON_UNKNOWN_PROPERTIES, false);
//反序列化时,属性不存在的兼容处理
this.getDeserializationConfig().withoutFeatures(DeserializationFeature.FAIL_ON_UNKNOWN_PROPERTIES);
SimpleModule simpleModule = new SimpleModule()
.addDeserializer(LocalDateTime.class, new LocalDateTimeDeserializer(DateTimeFormatter.ofPattern(DEFAULT_DATE_TIME_FORMAT)))
.addDeserializer(LocalDate.class, new LocalDateDeserializer(DateTimeFormatter.ofPattern(DEFAULT_DATE_FORMAT)))
.addDeserializer(LocalTime.class, new LocalTimeDeserializer(DateTimeFormatter.ofPattern(DEFAULT_TIME_FORMAT)))
.addSerializer(BigInteger.class, ToStringSerializer.instance)
.addSerializer(Long.class, ToStringSerializer.instance)
.addSerializer(LocalDateTime.class, new LocalDateTimeSerializer(DateTimeFormatter.ofPattern(DEFAULT_DATE_TIME_FORMAT)))
.addSerializer(LocalDate.class, new LocalDateSerializer(DateTimeFormatter.ofPattern(DEFAULT_DATE_FORMAT)))
.addSerializer(LocalTime.class, new LocalTimeSerializer(DateTimeFormatter.ofPattern(DEFAULT_TIME_FORMAT)));
//注册功能模块 例如,可以添加自定义序列化器和反序列化器
this.registerModule(simpleModule);
}
}在
WebMvcConfig配置类中扩展Spring MVC的消息转换器,在此消息转换器中使用提供的对象转换器进行java对象到json数据的转换这里在
config包下创建WebMvcConfig类,前面0-准备工作中导入前端页面部分也涉及这个类。- SSM方式:如果没有配置前面的资源映射,使用springboot默认方式,则此时运行会找不到静态页面
- Springboot方式:不需要配置资源映射
- SSM方式:
extends WebMvcConfigurationSupport
1
2
3
4
5
6
7
8
9
10
11
12
13
14
public class WebMvcConfig extends WebMvcConfigurationSupport {
protected void extendMessageConverters(List<HttpMessageConverter<?>> converters) {
//创建消息转换器对象
MappingJackson2HttpMessageConverter messageConverter = new MappingJackson2HttpMessageConverter();
//设置对象转化器,底层使用jackson将java对象转为json
messageConverter.setObjectMapper(new JacksonObjectMapper());
//将上面的消息转换器对象追加到mvc框架的转换器集合当中(index设置为0,表示设置在第一个位置,避免被其它转换器接 收,从而达不到想要的功能)
converters.add(0, messageConverter);
}
}SpringBoot方式:
implements WebMvcConfigurer以后默认使用下述方式
1
2
3
4
5
6
7
8
9
10
11
12
13
14
public class WebMvcConfig implements WebMvcConfigurer {
public void extendMessageConverters(List<HttpMessageConverter<?>> converters) {
//创建消息转换器对象
MappingJackson2HttpMessageConverter messageConverter = new MappingJackson2HttpMessageConverter();
//设置对象转化器,底层使用jackson将java对象转为json
messageConverter.setObjectMapper(new JacksonObjectMapper());
//将上面的消息转换器对象追加到mvc框架的转换器集合当中(index设置为0,表示设置在第一个位置,避免被其它转换器接收,从而达不到想要的功能)
converters.add(0, messageConverter);
}
}
最终效果
此时点击禁用后,页面的状态就会发生变化

目前存在问题:管理员也可以禁用自己,如果此时登出下次就无法登录,所以需要在前端进行相应条件判断,如果是管理员就不显示禁用按钮。
编辑员工信息
在开发代码之前,我们先来梳理一下整个操作流程与对应程序的执行顺序
- 点击编辑按钮时,页面将跳转到
add.html,并在url中携带参数员工id - 在
add.html页面中获取url中的参数员工id - 发送
ajax请求,请求服务端,同时提交员工id参数 - 服务端接受请求,并根据
员工id查询员工信息,并将员工信息以json形式响应给页面 - 页面接收服务端响应的
json数据,并通过Vue的双向绑定进行员工信息回显 - 点击保存按钮,发送ajax请求,将页面中的员工信息以json形式提交给服务端
- 服务端接受员工信息,并进行处理,完成后给页面响应
- 页面接收到服务端响应信息后进行相应处理
注意add.html为公共页面,新增员工和编辑员工都在此页面进行
请求执行过程
list.html页面的编辑按钮点击事件
1
2
3
4
5
6
7
8
9<el-button
type="text"
size="small"
class="blueBug"
@click="addMemberHandle(scope.row.id)"
:class="{notAdmin:user !== 'admin'}"
>
编辑
</el-button>点击后触发
addMemberHandle()方法,并传递此行用户的idaddMemberHandle函数,因为公用了add.html页面,所以这里判断传递的参数,如果是add就是新增,如果是id就是修改1
2
3
4
5
6
7
8
9
10
11
12
13
14
15
16// 添加
addMemberHandle (st) {
if (st === 'add'){
window.parent.menuHandle({
id: '2',
url: '/backend/page/member/add.html',
name: '添加员工'
},true)
} else {
window.parent.menuHandle({
id: '2',
url: '/backend/page/member/add.html?id='+st,
name: '修改员工'
},true)
}
},如果是修改,就跳转到add.html页面,并且携带id参数
add.html页面
1
2
3
4
5
6
7
8
9
10
11
12
13
14
15
16
17
18
19
20
21created() {
this.id = requestUrlParam('id')
this.actionType = this.id ? 'edit' : 'add'
if (this.id) {
this.init()
}
},
methods: {
async init () {
queryEmployeeById(this.id).then(res => {
console.log(res)
if (String(res.code) === '1') {
console.log(res.data)
this.ruleForm = res.data
this.ruleForm.sex = res.data.sex === '0' ? '女' : '男'
// this.ruleForm.password = ''
} else {
this.$message.error(res.msg || '操作失败')
}
})
},vue的created函数调用
requestUrlParam判断是否存在id参数,如果存在就是edit,否则是add然后调用下面的init,根据id查询数据,加载在页面上
requestUrlParam方法1
2
3
4
5
6
7
8
9
10
11
12
13//获取url地址上面的参数
function requestUrlParam(argname){
var url = location.href
var arrStr = url.substring(url.indexOf("?")+1).split("&")
for(var i =0;i<arrStr.length;i++)
{
var loc = arrStr[i].indexOf(argname+"=")
if(loc!=-1){
return arrStr[i].replace(argname+"=","").replace("?","")
}
}
return ""
}这里使用location.href获取当前url地址,然后将携带参数保存在数组中,获取指定参数key对应的value
queryEmployeeById方法,发送ajax请求给后端,对响应数据加载在前端1
2
3
4
5
6
7// 修改页面反查详情接口
function queryEmployeeById (id) {
return $axios({
url: `/employee/${id}`,
method: 'get'
})
}这里就得出后端需要拦截的请求,也就是
/employee/${id},并且返回应该是实体类内容修改数据后,点击保存按钮,触发
submitForm1
2
3
4
5
6<el-button
type="primary"
@click="submitForm('ruleForm', false)"
>
保存
</el-button>添加和修改的保存按钮,都是用的同一个表单提交事件submitForm
submitForm方法判断是add还是edit,然后使用不同方法:addEmployee和editEmployee1
2
3
4
5
6
7
8
9
10
11
12
13
14
15
16
17
18
19
20
21
22
23
24
25
26
27
28
29
30
31
32
33
34
35
36
37
38
39
40
41
42
43
44
45
46
47
48
49
50
51
52submitForm (formName, st) {
this.$refs[formName].validate((valid) => {
if (valid) {
if (this.actionType === 'add') {
const params = {
...this.ruleForm,
sex: this.ruleForm.sex === '女' ? '0' : '1'
}
addEmployee(params).then(res => {
if (res.code === 1) {
this.$message.success('员工添加成功!')
if (!st) {
this.goBack()
} else {
this.ruleForm = {
username: '',
'name': '',
'phone': '',
// 'password': '',
// 'rePassword': '',/
'sex': '男',
'idNumber': ''
}
}
} else {
this.$message.error(res.msg || '操作失败')
}
}).catch(err => {
this.$message.error('请求出错了:' + err)
})
} else { //这里开始时edit
const params = {
...this.ruleForm,
sex: this.ruleForm.sex === '女' ? '0' : '1'
}
editEmployee(params).then(res => {
if (res.code === 1) {
this.$message.success('员工信息修改成功!')
this.goBack()
} else {
this.$message.error(res.msg || '操作失败')
}
}).catch(err => {
this.$message.error('请求出错了:' + err)
})
}
} else {
console.log('error submit!!')
return false
}
})
}addEmployee和editEmployee的内容
1
2
3
4
5
6
7
8
9
10
11
12
13
14
15
16
17// 新增---添加员工
function addEmployee (params) {
return $axios({
url: '/employee',
method: 'post',
data: { ...params }
})
}
// 修改---添加员工
function editEmployee (params) {
return $axios({
url: '/employee',
method: 'put',
data: { ...params }
})
}可以看出编辑员工发送的是
/employee路径的put请求,这和前面禁用启用的发送的请求一致,都是修改员工信息,所以这里直接调用了之前的更新方法,对数据库内容进行了更新1
2
3
4
5
6
7
8
9
10
public R<String> update(HttpServletRequest request, Employee employee){
log.info("employee:{}", employee.toString());
//获取当前账户id
Long id = (Long) request.getSession().getAttribute("employee");
employee.setUpdateUser(id);
employee.setUpdateTime(LocalDateTime.now());
employeeService.updateById(employee);
return R.success("员工信息修改成功");
}
控制器方法
1 |
|
公共字段自动填充
前面我们已经完成了对员工数据的添加与修改,在添加/修改员工数据的时候,都需要指定一下创建人、创建时间、修改人、修改时间等字段,而这些字段又属于公共字段,不仅员工表有这些字段,在菜品表、分类表等其他表中,也拥有这些字段。
那我们有没有办法让这些字段在一个地方统一管理呢?这样可以简化我们的开发。答案就是使用MybatisPlus给我们提供的公共字段自动填充功能
初步实现
- 在实体类的属性上方加入
@TableFiled注解,指定自动填充的策略
1 |
|
按照框架要求编写元数据对象处理器,在此类中统一对公共字段赋值,此类需要实现
MetaObjectHandler接口
实现接口之后,重写两个方法,一个是插入时填充,一个是修改时填充common/MyMetaObjectHandler.java1
2
3
4
5
6
7
8
9
10
11
12
13
14
15
16
17
18
public class MyMetaObjectHandler implements MetaObjectHandler {
public void insertFill(MetaObject metaObject) {
log.info("公共字段自动填充(insert)...");
log.info(metaObject.toString());
metaObject.setValue("createTime", LocalDateTime.now());
metaObject.setValue("updateTime", LocalDateTime.now());
}
public void updateFill(MetaObject metaObject) {
log.info("公共字段自动填充(update)...");
log.info(metaObject.toString());
metaObject.setValue("updateTime", LocalDateTime.now());
}
}使用metaObject的
setValue来实现字段填充方式关于id的获取,我们之前是存到session里的,但在
MyMetaObjectHandler类中不能获得HttpSession对象,所以我们需要用其他方式来获取登录用户Id
现在就可以把之前save和update中的时间、修改者字段的赋值代码去掉,统一在这里进行处理
功能完善
如何获取当前登录用户的id值?我们可以使用ThreadLocal来解决这个问题
在学习ThreadLocal之前,我们需要先确认一个事情,就是客户端发送的每次http请求,对应的在服务端都会分配一个新的线程来处理,在处理过程中涉及到下面类中的方法都属于相同的一个线程:
LocalCheekFilter中的doFilter方法EmployeeController中的update方法MyMetaObjectHandler中的updateFill方法
可以通过在这些方法中添加以下语句以验证:
1
2long id = Thread.currentThread().getId();
log.info("doFilter的线程id为:{}", id);那么什么是ThreadLocal?
- ThreadLocal并不是一个Thread,而是Thread的局部变量
- 当使用ThreadLocal维护变量时,ThreadLocal为每个使用该变量的线程提供独立的变量副本
- 所以每一个线程都可以独立地改变自己的副本,而不会影响其它线程所对应的副本
- ThreadLocal为每个线程提供单独一份存储空间,具有线程隔离的效果,只有在线程内才能获取到对应的值,线程外则不能访问。
ThreadLocal常用方法:
public void set(T value)设置当前线程的线程局部变量的值public T get()返回当前线程所对应的线程局部变量的值
那么如何用ThreadLocal来解决我们上述的问题呢?
- 可以在
LoginCheckFilter的doFilter方法中获取当前登录用户id, 调用ThreadLocal的set方法来设置当前线程的线程局部变量的值(用户id) - 然后在
MyMetaObjectHandler的updateFill方法中调用ThreadLocal的get方法来获得当前线程所对应的线程局部变量的值(用户id)。
- 可以在
具体实现
在
common包下新建BaseContext类作用:基于ThreadLocal的封装工具类,用于保护和获取当前用户id
1
2
3
4
5
6
7
8
9
10
11public class BaseContext {
public static ThreadLocal<Long> threadLocal = new ThreadLocal<>();
public static void setCurrentId(Long id){
threadLocal.set(id);
}
public static Long getCurrentId(){
return threadLocal.get();
}
}在
LoginCheckFilter类中添加代码, 使用request.getSession来获取当前登录用户的id值1
2
3
4
5
6
7
8
9
10
11//4.判断登录状态,如果已登录,则直接放行
if (request.getSession().getAttribute("employee") != null) {
log.info("用户已登录,id为{}",request.getSession().getAttribute("employee"));
//根据session来获取之前我们存的id值
Long empId = (Long) request.getSession().getAttribute("employee");
BaseContext.setCurrentId(empId);
filterChain.doFilter(request,response);
return;
}在MyMetaObjectHandler类中,添加设置id的代码
1
2
3
4
5
6
7
8
9
10
11
12
13
14
15
16
17
18
19
20
21
22
public class MyMetaObjectHandler implements MetaObjectHandler {
public void insertFill(MetaObject metaObject) {
log.info("公共字段自动填充(insert)...");
log.info(metaObject.toString());
metaObject.setValue("createTime", LocalDateTime.now());
metaObject.setValue("updateTime", LocalDateTime.now());
metaObject.setValue("createUser", BaseContext.getCurrentId());
metaObject.setValue("updateUser", BaseContext.getCurrentId());
}
public void updateFill(MetaObject metaObject) {
log.info("公共字段自动填充(update)...");
log.info(metaObject.toString());
metaObject.setValue("updateTime", LocalDateTime.now());
metaObject.setValue("updateUser", BaseContext.getCurrentId());
}
}
此时就完成了公共字段的自动填充
新增菜品分类
需求分析
- 后台系统中可以管理分类信息,分类包括两种类型,分别是菜品分类和套餐分类
- 当我们在后台系统中添加菜品时,需要选择一个菜品分类
- 当我们在后台系统中天啊及一个套餐时,需要选择一个套餐分类
- 在移动端也会按照菜品分类和套餐分类来战士对应的菜品和套餐
数据模型
category表中的数据
| Field | Type | Collation | Null | Key | Default | Comment |
|---|---|---|---|---|---|---|
| id | bigint | (NULL) | NO | PRI | (NULL) | 主键 |
| type | int | (NULL) | YES | 类型 1 菜品分类 2 套餐分类 | ||
| name | varchar(64) | utf8_bin | NO | UNI | (NULL) | 分类名称 |
| sort | int | (NULL) | NO | 0 | 顺序 | |
| create_time | datetime | (NULL) | NO | (NULL) | 创建时间 | |
| update_time | datetime | (NULL) | NO | (NULL) | 更新时间 | |
| create_user | bigint | (NULL) | NO | (NULL) | 创建人 | |
| update_user | bigint | (NULL) | NO | (NULL) | 修改人 |
id是主键,name分类名称是unique唯一的,type为1表示菜品分类,type为2表示套餐分类
准备工作
实体类Category,对应上表来创建
菜品分类也有
createUser和createTime等字段,也可以用上面的公共字段自动填充1
2
3
4
5
6
7
8
9
10
11
12
13
14
15
16
17
18
19
20
21
22
23
24
25
26
27
28
29
30
31
32
33
34
35/**
* 分类
*/
public class Category implements Serializable {
private static final long serialVersionUID = 1L;
private Long id;
//类型 1 菜品分类 2 套餐分类
private Integer type;
//分类名称
private String name;
//顺序
private Integer sort;
//创建时间
private LocalDateTime createTime;
//更新时间
private LocalDateTime updateTime;
//创建人
private Long createUser;
//修改人
private Long updateUser;
//是否删除(注意,这里数据库没有对应field)
//private Integer isDeleted;
}Mapper接口CategoryMapper
1
2
3
public interface CategoryMapper extends BaseMapper<Category> {
}业务层接口CategoryService
1
2public interface CategoryService extends IService<Category> {
}业务层实现类CatrgoryServiceImpl
1
2
3
public class CategoryServiceImpl extends ServiceImpl<CategoryMapper, Category> implements CategoryService{
}控制层CategoryController
1
2
3
4
5
6
7
public class CategoryController {
private CategoryService categoryService;
}
流程分析
整个流程
- 页面发送ajax请求,将新增分类窗口输入的数据以json形式提交给服务端
- 服务端Controller接收页面提交的数据并调用Service将数据存储到数据库
- Service调用Mapper操作数据库,保存数据
监测请求
点击新增菜品后,会看到发送的url请求,请求方式,请求参数

点击新增套餐后,会看到发送的url请求,请求方式,请求参数

可以看出,二者的请求url都相同,区别在于请求参数中的type,这与前面的数据库相对应
代码实现
1 |
|
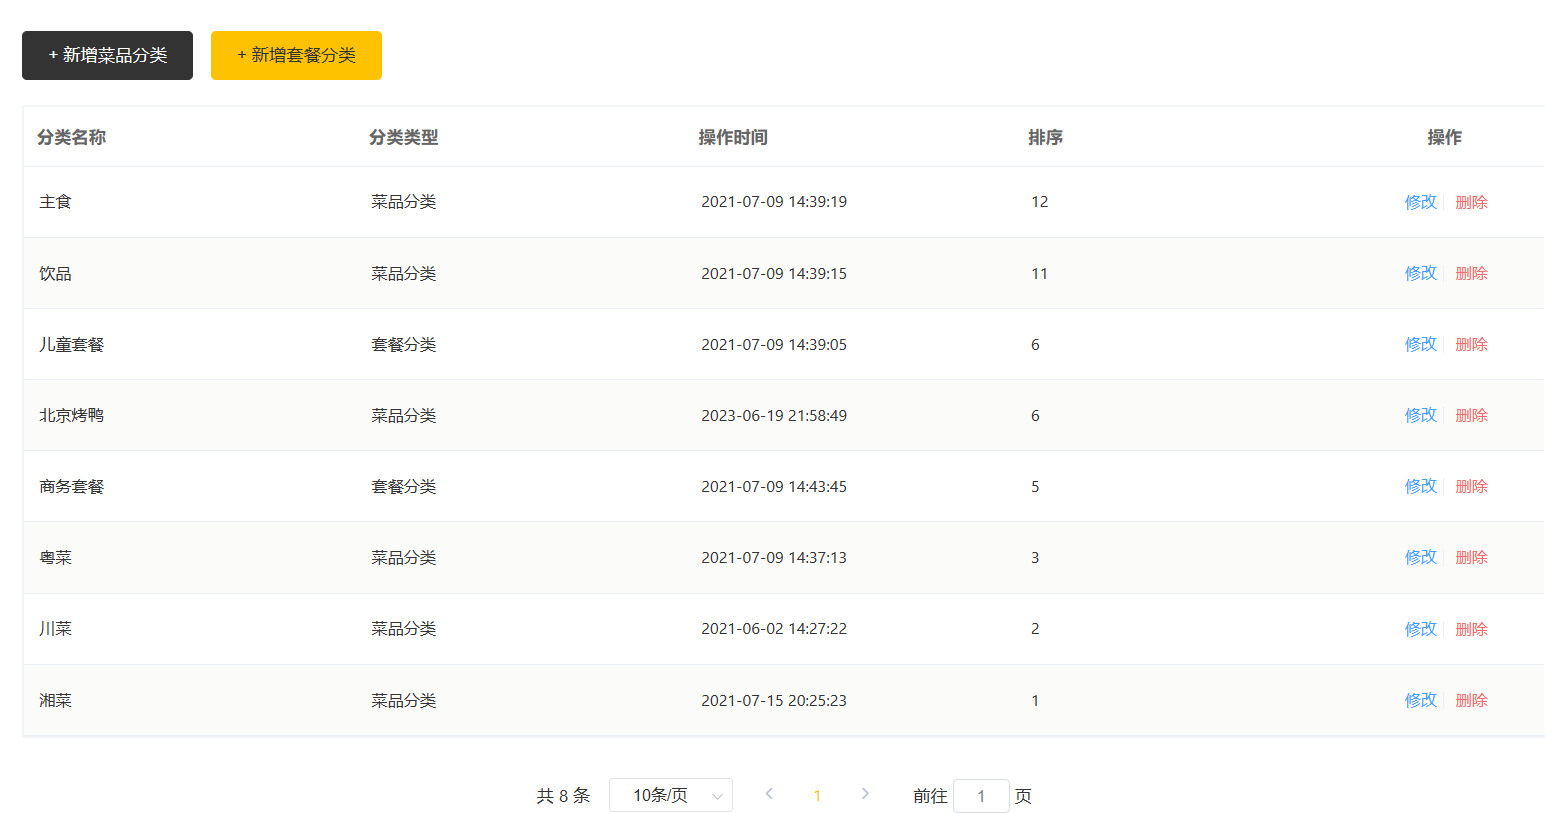
目前在分类管理页面会报错,因为目前还没有进行分页显示操作,所以添加数据后在数据库中查看
1 | ==> Preparing: INSERT INTO category ( id, type, name, sort, create_time, update_time, create_user, update_user ) VALUES ( ?, ?, ?, ?, ?, ?, ?, ? ) |

这里如果输入重复的名称,也会被前面的2.3全局异常处理器捕获并报错
分类信息分页查询
流程
- 页面发送Ajax请求,将分页查询的参数(page、pageSize)提交到服务端
- 服务端Controller接受到页面提交的数据之后,调用Service进行查询
- Service调用Mapper操作数据库,查询分页数据
- Controller将查询到的分页数据响应给页面
- 页面接收分页数据,并通过ElementUI的Table组件展示到页面上
可以看到,分页发的送的请求如下:
前端代码分析
- 页面加载完毕之后调用created钩子函数, 钩子函数内又调用的是init进行初始化
1 | created() { |
- init函数
1 | async init () { |
- getCategoryPage方法
api/category.js
1 | // 查询列表接口 |
控制器方法
1 |
|
效果:
删除分类
- 在分类管理列表页面,可以对某个分类进行删除操作
- 需要注意的是:当分类关联了菜品或者套餐时,此分类将不允许被删除
前端代码分析
1.backend/page/category/list.html
1 | <el-button |
deleteHandle()
1 | deleteHandle(id) { |
调用
deleCategory方法传入id
deleCategory()
1 | // 删除当前列的接口 |
可以看出请求方式和url以及请求参数
初步实现
1 | /** |
功能完善
当菜品分类或套餐分类关联了其他菜品或套餐时,该分类将不允许被删除。那么我们如何实现这个功能呢?
- 其实也很简单,我们只需要在删除的时候,拿着当前分类的id值,去对应的菜品/套餐表中进行查询,如果能查询到数据,则说明该分类关联了菜品,不允许被删除,否则则可以删除
首先根据数据表创建菜品和套餐对应的模型类
Dish.java和Setmeal.java;编写对应的Mapper接口;编写对应的Service接口及Impl实现类完善
CategoryService,接口中自己写一个remove方法,判断该id对应的菜品分类或者套餐分类是否关联了菜品或套餐1
2
3public interface CategoryService extends IService<Category> {
public void remove(Long id);
}在
CategoryServiceImpl中来写具体业务逻辑,在删除数据之前,根据id值,去Dish表和Setmeal表中查询是否关联了数据
如果存在关联数据,则不能删除,并抛一个异常; 如果不存在关联数据(也就是查询到的数据条数为0),正常删除即可
1 |
|
这里面通过条件查询获取类别id对应的菜品或者套餐的数量count,如果不为零则说明有关联,则抛出业务异常,反之进行常规的按照id删除数据
上面抛出了业务异常
CustomExceptioncommon/CustomException1
2
3
4
5public class CustomException extends RuntimeException {
public CustomException(String msg) {
super(msg);
}
}然后在全局异常处理器新添加一个方法捕获异常
1
2
3
4
5
public R<String> CustHandler(CustomException ex){
log.error(ex.getMessage());
return R.error(ex.getMessage());
}类比前面的用户已存在异常的写法,标注
@ExceptionHandler注解,其中填上自定义的业务异常,然后返回异常信息的R类对象即可最后,优化之前的初步实现,更改原本的
removeById()为自定义的remove(),实现有条件的删除1
2
3
4
5
6
public R<String> delete(Long ids){
log.info("将被删除的id:{}", ids);
categoryService.remove(ids); //
return R.success("分类信息删除成功");
}
效果展示:

修改分类
前端代码分析
修改按钮
1
2
3
4
5
6
7
8<el-button
type="text"
size="small"
class="blueBug"
@click="editHandle(scope.row)"
>
修改
</el-button>点击事件
1
2
3
4
5
6
7
8editHandle(dat) {
this.classData.title = '修改分类'
this.action = 'edit'
this.classData.name = dat.name
this.classData.sort = dat.sort
this.classData.id = dat.id
this.classData.dialogVisible = true
},这里会指定弹窗的名称,传入指定数据的name、sort及id,并且action为edit(因为edit和add是共用的,通过这个属性区别)
确定取消按钮
1
2
3
4
5
6
7
8
9
10<el-button
size="medium"
@click="classData.dialogVisible = false"
>取 消</el-button>
<el-button
type="primary"
size="medium"
@click="submitForm()"
>确 定</el-button>
<el-button确定点击事件会将前端表单数据通过ajax请求传递给后端
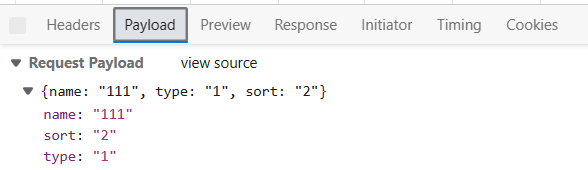
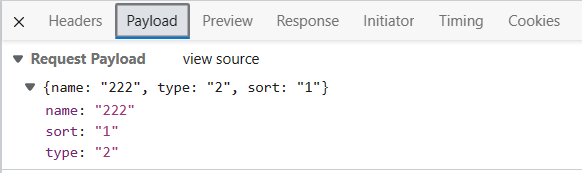
提交表单方法(add和edit公用)
1
2
3
4
5
6
7
8
9
10
11
12
13
14
15
16
17
18
19
20
21
22
23
24
25
26
27
28
29
30
31
32
33
34
35
36
37
38
39
40
41
42
43
44
45
46
47
48
49
50
51
52
53//数据提交
submitForm(st) {
const classData = this.classData
const valid = (classData.name === 0 ||classData.name) && (classData.sort === 0 || classData.sort)
if (this.action === 'add') {
if (valid) {
const reg = /^\d+$/
if (reg.test(classData.sort)) {
addCategory({'name': classData.name,'type':this.type, sort: classData.sort}).then(res => {
console.log(res)
if (res.code === 1) {
this.$message.success('分类添加成功!')
if (!st) {
this.classData.dialogVisible = false
} else {
this.classData.name = ''
this.classData.sort = ''
}
this.handleQuery()
} else {
this.$message.error(res.msg || '操作失败')
}
}).catch(err => {
this.$message.error('请求出错了:' + err)
})
} else {
this.$message.error('排序只能输入数字类型')
}
} else {
this.$message.error('请输入分类名称或排序')
}
} else if (valid) { //从这行开始是edit
const reg = /^\d+$/
if (reg.test(this.classData.sort)) {
editCategory({'id':this.classData.id,'name': this.classData.name, sort: this.classData.sort}).then(res => {
if (res.code === 1) {
this.$message.success('分类修改成功!')
this.classData.dialogVisible = false
this.handleQuery()
} else {
this.$message.error(res.msg || '操作失败')
}
}).catch(err => {
this.$message.error('请求出错了:' + err)
})
} else {
this.$message.error('排序只能输入数字类型')
}
} else {
this.$message.error('请输入分类名称或排序')
}
},调用editCategory方法发送ajax请求,传递json参数
{'id':this.classData.id,'name': this.classData.name, sort: this.classData.sort}editCategory传递ajax请求1
2
3
4
5
6
7
8// 修改接口
const editCategory = (params) => {
return $axios({
url: '/category',
method: 'put',
data: { ...params }
})
}
控制器方法
1 |
|
文件的上传和下载
简介
上传
文件上传时,对页面的form表单有如下要求:
method="post",采用post方式提交数据enctype="multipart/form-data",采用multipart格式上传文件type="file",使用input的file控件上传
目前一些前端组件库elementUI也提供了相应的上传组件,但是底层原理还是基于form表单的文件上传,这里我们就用提供好的组件就行了
服务端要接收客户端页面上传的文件,通常都会使用Apache的两个组件:
commons-fileuploadcommons-io
Spring框架在spring-web包中对文件上传进行了封装,大大简化了服务端代码,我们只需要在Controller的方法中声明一个MultipartFile类型的参数即可接收上传的文件。
1
2
3
4
5
public Result<String> upload(MultipartFile file) {
log.info("获取文件:{}", file.toString());
return null;
}注意:这里形参file名字不能随意更改,需要和前端的请求中的参数一致
下载
- 通过浏览器进行文件下载,通常有两种表现形式
- 以附件形式下载,弹出保存对话框,将文件保存到指定磁盘目录
- 直接在浏览器中打开
- 通过浏览器进行文件下载,本质上就是服务端将文件以流的形式写回浏览器的过程
上传代码实现
前端分析
首先将资料中的上传页面复制到工程目录下
backend/page/demo/upload.html(新建demo目录)浏览器输入对应url地址后进行上传页面的访问,页面效果如下:
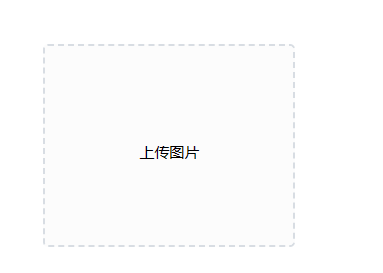
然后点击上传图片,查看请求发送内容:
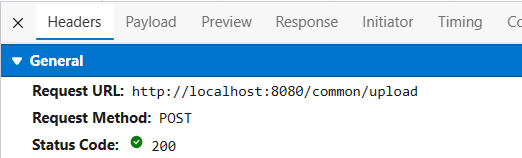
可以看出请求地址是
/common/upload,方式为POST
控制器方法初步
创建CommonTroller管理上传下载的请求,这里先拦截上传请求
1 |
|
但是此时控制台并没有收到信息,而是被拦截了,这就想到之前创建的filter拦截器,把我们这里的请求拦截了,然后看network中发现传回msg信息”NOTLOGIN”,这是因为我们直接访问而没有登录导致的:
有两种方法解决这个问题:
先登录再上传:
1
INFO 18232 --- [nio-8080-exec-3] com.wzy.controller.CommonController : 上传图片信息org.springframework.web.multipart.support.StandardMultipartHttpServletRequest$StandardMultipartFile@daddd5b
这时捕获到日志信息
修改拦截器中的内容
上传的文件会被保存在本地的一个临时文件中,我们可以对其进行转存:
1 |
|
控制器方法优化
系列优化:
文件转存的位置改为动态可配置的,通过配置文件的方式指定,在application.yml文件中加入以下内容
1
2reggie:
path: E:\\reggie\\img\\使用
@Value(“${reggie.path}”)读取到配置文件中的动态转存位置使用uuid方式重新生成文件名,避免文件名重复造成文件覆盖
通过获取原文件名来截取文件后缀
1 |
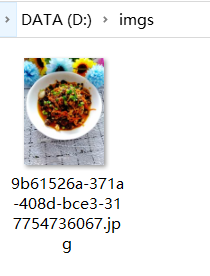
|
这时上传就会再资源管理器中看见创建的目录及保存的文件
下载代码实现
前端分析
我们在上传的同时,也自动将上传的文件下载到服务器,然后加载在页面中,从下面的请求可以看出
上传界面
1
2
3
4
5
6
7
8
9<el-upload class="avatar-uploader"
action="/common/upload"
:show-file-list="false"
:on-success="handleAvatarSuccess"
:before-upload="beforeUpload"
ref="upload">
<img v-if="imageUrl" :src="imageUrl" class="avatar"></img>
<i v-else class="el-icon-plus avatar-uploader-icon"></i>
</el-upload>这里上传成功后会调用
handleAvatarSuccess放法handleAvatarSuccess()1
2
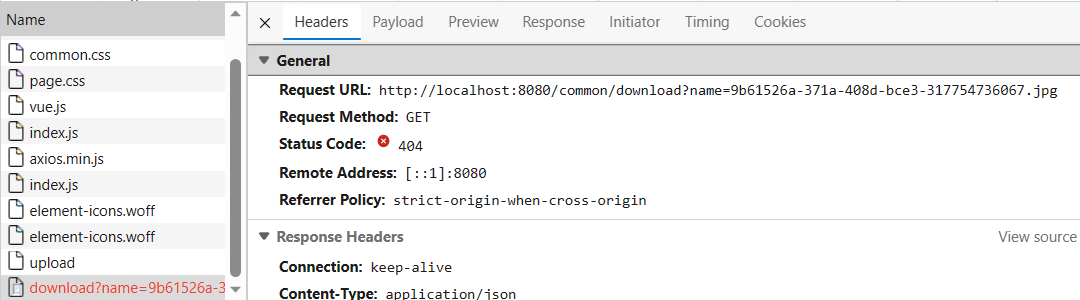
3handleAvatarSuccess (response, file, fileList) {
this.imageUrl = `/common/download?name=${response.data}`
},给
imageUrl赋值为/common/download?name=${response.data}。这对应了1中标签的src属性,就会发送这个请求,加载对应的response,而前面的response是文件名称,所以再开始的F12图中的url链接name后是文件名称
控制器方法实现
因为前面可以看出download的请求连接包含了name,这个name是上传时返回给的name,所以这里接收name参数,并且需要HttpServletResponse将数据流进行展示
1 |
|
页面效果:

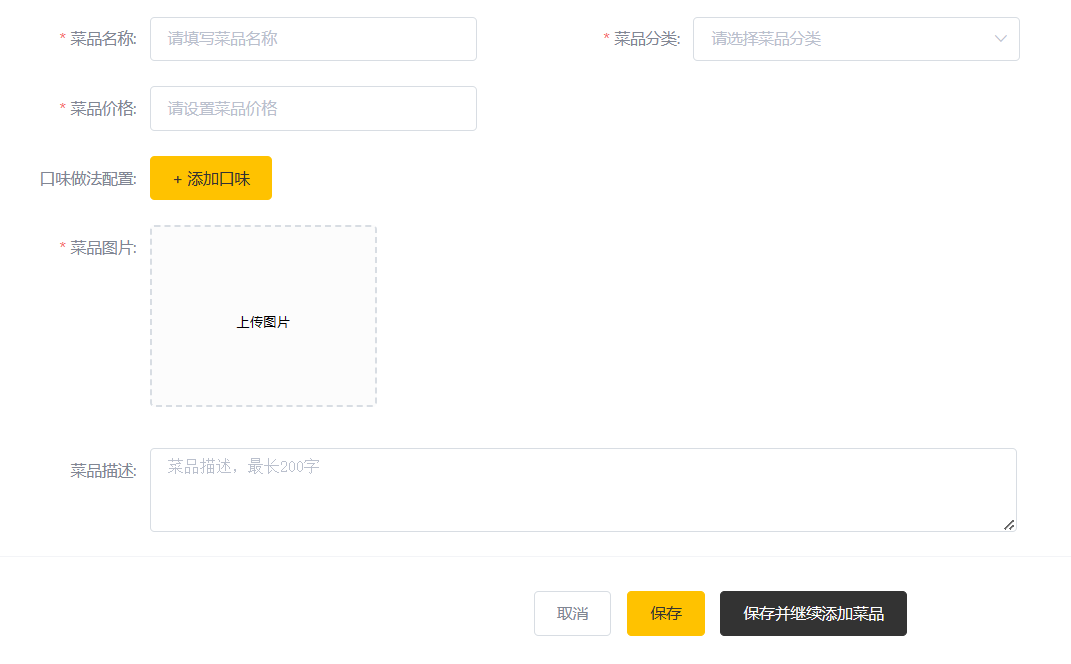
新增菜品
准备工作
新增菜品,其实就是将新增页面录入的菜品信息插入到dish表,如果添加了口味做法,还需要向dish_flavor表中插入数据。所以在新增菜品时涉及到两个表:dish、dish_flavor
导入DishFlavor实体类,然后创建Mapper、Service、ServiceImpl,controller还用DishController
整个流程
- 页面(backend/page/food/add.html)发送ajax请求,请求服务端获取菜品分类数据并展示到下拉框中
- 页面发送请求进行图片上传,请求服务端将图片保存到服务器
- 页面发送请求进行图片下载,并回显上传的图片
- 点击保存按钮,发送ajax请求,将菜品相关数据以json形式提交到服务端
查询分类数据
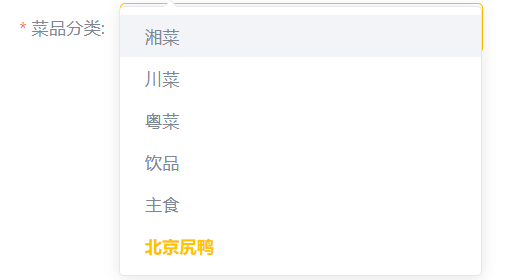
可以看出新增时需要先选择菜品的分类,这部分在Category中有所定义,type=1为菜品,type=2为套餐,这里默认type=1,然后使用type作为条件查询字段从数据库中获取所有的菜品类别,展示在下拉框中,以供选择。
我们首次进入添加页面会发送如下请求,表明先在Category中进行了查询
前端分析
下拉框部分内容
1
2
3
4
5
6
7
8
9
10
11<el-form-item
label="菜品分类:"
prop="categoryId"
>
<el-select
v-model="ruleForm.categoryId"
placeholder="请选择菜品分类"
>
<el-option v-for="(item,index) in dishList" :key="index" :label="item.name" :value="item.id" />
</el-select>
</el-form-item>vue钩子函数部分
1
2
3
4
5
6
7
8
9
10created() {
this.getDishList()
// 口味临时数据
this.getFlavorListHand()
this.id = requestUrlParam('id')
this.actionType = this.id ? 'edit' : 'add'
if (this.id) {
this.init()
}
},调用getDishList函数获取类别
getDishList()1
2
3
4
5
6
7
8
9
10// 获取菜品分类
getDishList () {
getCategoryList({ 'type': 1 }).then(res => {
if (res.code === 1) {
this.dishList = res.data
} else {
this.$message.error(res.msg || '操作失败')
}
})
},调用
getCategoryList, 可以看出默认传递type=1,也就是菜品类别,然后将返回的数据封装在下拉列表中展示,注意这里存放在list中,所以控制器方法返回应该是list类型getCategoryList()1
2
3
4
5
6
7
8// 获取菜品分类列表
const getCategoryList = (params) => {
return $axios({
url: '/category/list',
method: 'get',
params
})
}这里看到url连接,发现是
/category,所以在CategoryController中进行对应请求的处理
控制器方法
CategoryController
1 |
|
注意:这里参数不要标注@RequestBody,因为前端并不是传的JSON数据,而是在地址栏传递的参数。其次,get方法没有请求体。
效果:
如何判断参数是JSON格式
对比以下两种ajax请求:
- 第一种参数使用
data:{...params}格式,封装成了JSON格式 - 第二种则是直接传递参数
params,所以就是url的携带参数
1 | // 新增接口 |
提交数据到服务器
目前填好数据点击确定,前端发送请求如下
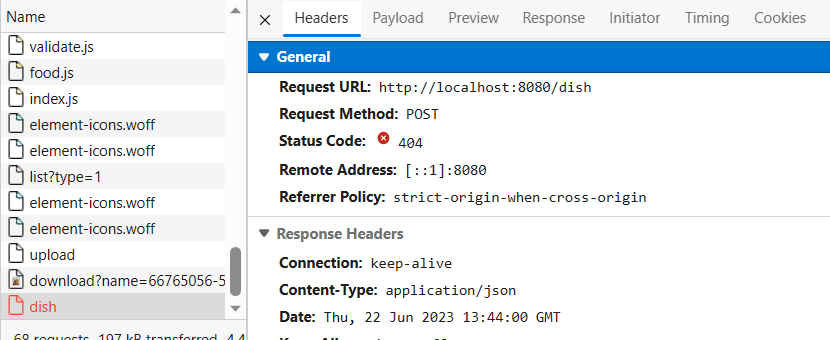
并且发送参数如下:
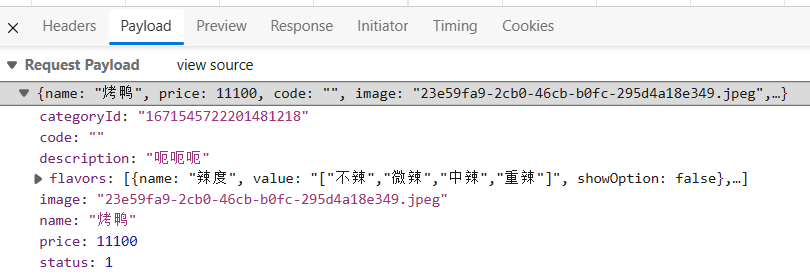
可以看到发送的参数不光包括dish,而且还有flavors,此时控制器方法就不能直接拿Dish来作为形参
前端分析
前端按钮
1
2
3
4
5
6<el-button
type="primary"
@click="submitForm('ruleForm')"
>
保存
</el-button>submitForm注意这里的price*100
1
2
3
4
5
6
7
8
9
10
11
12
13
14
15
16
17
18
19
20
21
22
23
24
25
26
27
28
29
30
31
32
33
34
35
36
37
38
39
40
41
42
43
44
45
46
47
48
49
50
51
52
53
54
55
56
57
58
59
60
61submitForm(formName, st) {
this.$refs[formName].validate((valid) => {
if (valid) {
let params = {...this.ruleForm}
// params.flavors = this.dishFlavors
params.status = this.ruleForm ? 1 : 0
params.price *= 100
params.categoryId = this.ruleForm.categoryId
params.flavors = this.dishFlavors.map(obj => ({ ...obj, value: JSON.stringify(obj.value) }))
delete params.dishFlavors
if(!this.imageUrl){
this.$message.error('请上传菜品图片')
return
}
if (this.actionType == 'add') {
delete params.id
addDish(params).then(res => {
if (res.code === 1) {
this.$message.success('菜品添加成功!')
if (!st) {
this.goBack()
} else {
this.dishFlavors = []
// this.dishFlavorsData = []
this.imageUrl = ''
this.ruleForm = {
'name': '',
'id': '',
'price': '',
'code': '',
'image': '',
'description': '',
'dishFlavors': [],
'status': true,
categoryId: ''
}
}
} else {
this.$message.error(res.msg || '操作失败')
}
}).catch(err => {
this.$message.error('请求出错了:' + err)
})
} else {
delete params.updateTime
editDish(params).then(res => {
if (res.code === 1) {
this.$message.success('菜品修改成功!')
this.goBack()
} else {
this.$message.error(res.msg || '操作失败')
}
}).catch(err => {
this.$message.error('请求出错了:' + err)
})
}
} else {
return false
}
})
},根据表单项初始化param,然后封装输入的内容,传递给
addDish方法,发送ajax请求给后端addDish1
2
3
4
5
6
7
8// 新增接口
const addDish = (params) => {
return $axios({
url: '/dish',
method: 'post',
data: { ...params }
})
}
引入DTO
前面说到,此时新增的表单数据不仅包括了dish,还有flavors,不能单用一个dish形参去接收,所以这里引入了DTO,全称为Data Transfer Object,即数据传输对象,一般用于展示层与服务层之间的数据传输。这里新建dto包,用于后续存放dto类
dto.DishDto
1 |
|
这里DishDto继承了Dish,并且新增了DishFlavor的列表属性,用于封装flavors数据
控制器方法
初步实现
1 |
|
debug结果,可以看出此时dishDto中接收到了表单输入内容
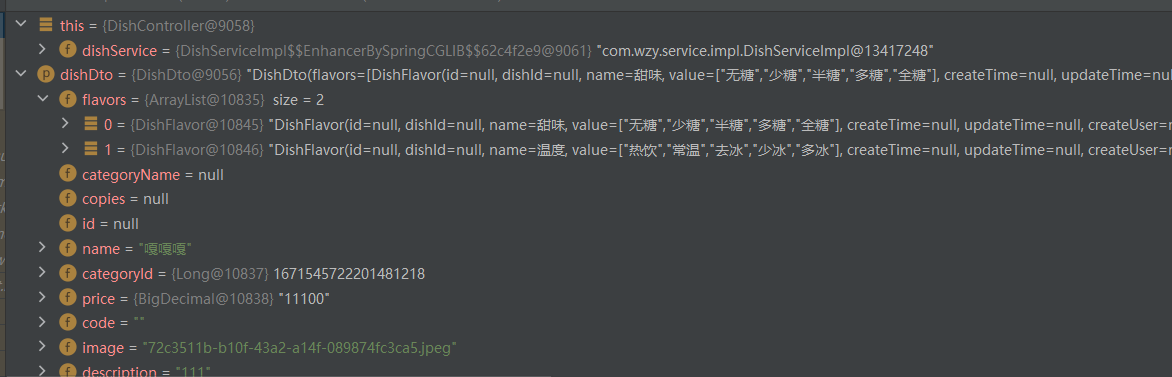
从上面结果可以看出DishFlavor中的dishId为null。但实际保存这些数据需要对DishFlavor中的dishId进行赋值才能直到这些口味对应哪些dish
后续需要改善的地方:
将菜品数据保存到
dish表将菜品口味数据保存到
dish_flavor表- 但是
dish_flavor表中需要一个dishId字段值,这个字段值需要我们从dishDto中获取 - 获取方式为:取出
dishDto的dishId,对每一组flavor的dishId赋值
- 但是
完善结果
在
DishService中编写一个saveWithFlavor方法1
2
3public interface DishService extends IService<Dish> {
void saveWithFlavor(DishDto dishDto);
}DishServiceImpl中实现这个方法这里注入了DishFlavorService,以便对口味表数据保存
1
2
3
4
5
6
7
8
9
10
11
12
13
14
15
16
17
18
19
20
21
22
23
public class DishServiceImpl extends ServiceImpl<DishServiceMapper, Dish> implements DishService {
private DishFlavorService dishFlavorService;
public void saveWithFlavor(DishDto dishDto) {
//将菜品数据保存到dish表
this.save(dishDto);
//获取dishId
Long id = dishDto.getId();
//将获取到的dishId赋值给dishFlavor的dishId属性
List<DishFlavor> flavors = dishDto.getFlavors();
for(DishFlavor dishFlavor : flavors){
dishFlavor.setDishId(id);
}
//同时将菜品口味数据保存到dish_flavor表
dishFlavorService.saveBatch(flavors);
}
}注意,将这个方法标注
@Transactional,即声明为事务,也就是这个方法内的数据库操作有一个失败,都会回退到原始状态如果不是Springboot项目,还需要再启动类上标注
@EnableTransactionManagement,开启事务注解驱动;而SpringBoot默认开启修改控制器方法,使用这个saveWithFlavor方法
1
2
3
4
5
6
public R<String> save( DishDto dishDto){
log.info("菜品新增数据{}", dishDto.toString());
dishService.saveWithFlavor(dishDto);
return R.success("菜品新增成功");
}
可以看到,数据新增成功

菜品分页查询
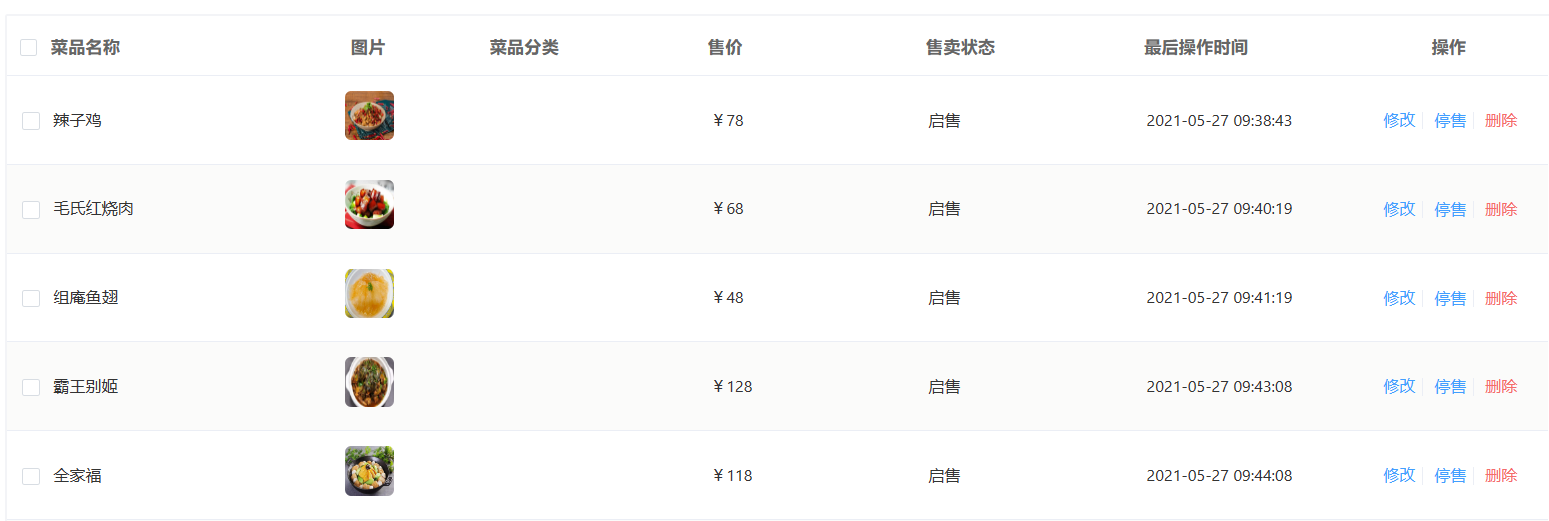
初步实现
1 |
|
注意:此时图片和菜品分类两列没有正常显示。此时将资源中的图片保存在之前设定的图片下载路径中即可正常显示
菜品分类内容显示
为什么不显示菜品分类内容?
- 控制器方法传递的是一个Dish对象,dish对象没有菜品分类名称属性,但是有菜品分类id
- 那我们就可以根据这个菜品分类id,去菜品分类表中查询对应的菜品分类名称
所以我们之前的DishDto类中的另外一个属性就派上用场了,我们返回一个DishDto对象就有菜品分类名称数据了
1
2
3
4
5
6
7
8
9
public class DishDto extends Dish {
//菜品口味
private List<DishFlavor> flavors = new ArrayList<>();
//菜品分类名称
private String categoryName;
private Integer copies;
}现在就可以把DishDto看做是Dish类的基础上,增加了一个
categoryName属性,到时候返回DishDto
具体实现思路就是:将查询出来的dish数据,赋给dishDto,然后在根据dish数据中的category_id,去菜品分类表中查询到category_name,将其赋给dishDto
1 |
|
菜品修改
整个流程
- 页面发送ajax请求,请求服务器获取分类数据,用于菜品分类下拉框的数据回显(之前我们已经实现过了)
- 页面发送ajax请求,请求服务端,根据id查询当前菜品信息,用于菜品信息回显
- 页面发送请求,请求服务端进行图片下载,用于页面图片回显(之前我们已经实现过了)
- 点击保存按钮,页面发送ajax请求,将修改后的菜品相关数据以json形式提交到服务端
菜品信息回显
前端分析
list.html中vue的init方法,会调用queryDishById,根据id获取内容
1 | async init () { |
queryDishById发送ajax请求
1 | // 查询详情 |
我们先点击修改按钮,发现如下的请求:可以看出首先根据id进行数据的回显

控制器方法
分析
- 菜品信息回显功能,需要我们先根据id来查询到对应的菜品信息才能回显
- 但修改表单中有一个菜品口味属性,普通的Dish类没有这个属性,所以还是要用到DishDto
- 那我们这里先在
DishServiceImpl编写一个getByIdWithFlavor方法 - 菜品口味需要根据
dish_id去dish_flavor表中查询,将查询到的菜品口味数据赋给我们的DishDto对象即可
DishServiceImpl编写一个getByIdWithFlavor方法
1 |
|
- 控制器方法
1 |
|
菜品信息修改
由于Dish表中没有Flavor这个属性,所以修改的时候,我们也是需要修改两张表
前端分析
修改按钮
1
2
3
4
5
6
7
8<el-button
type="text"
size="small"
class="blueBug"
@click="addFoodtype(scope.row.id)"
>
修改
</el-button>点击事件
1
2
3
4
5
6
7
8
9
10
11
12
13
14
15
16// 添加
addFoodtype (st) {
if (st === 'add'){
window.parent.menuHandle({
id: '4',
url: '/backend/page/food/add.html',
name: '添加菜品'
},true)
} else { //修改部分
window.parent.menuHandle({
id: '4',
url: '/backend/page/food/add.html?id='+st,
name: '修改菜品'
},true)
}
},跳转到
/backend/page/food/add.html?id=页面,并携带前端传来的id参数add.html中vue钩子函数,判断是否传来id,如果传来id,则类型为edit,也就是修改1
2
3
4
5
6
7
8
9
10created() {
this.getDishList()
// 口味临时数据
this.getFlavorListHand()
this.id = requestUrlParam('id')
this.actionType = this.id ? 'edit' : 'add'
if (this.id) {
this.init()
}
},参数提交方法
1
2
3
4
5
6
7
8
9
10
11
12
13else { //前面是add逻辑,这里是edit
delete params.updateTime
editDish(params).then(res => {
if (res.code === 1) {
this.$message.success('菜品修改成功!')
this.goBack()
} else {
this.$message.error(res.msg || '操作失败')
}
}).catch(err => {
this.$message.error('请求出错了:' + err)
})
}这里把前端修改后的参数传递给后端
editDish()发送ajax请求1
2
3
4
5
6
7
8// 修改接口
const editDish = (params) => {
return $axios({
url: '/dish',
method: 'put',
data: { ...params }
})
}
控制器方法
分析:
- 此时修改菜品,不仅包含dish的数据,还包括flavors,所以不仅需要更改dish数据库,还需要更改flavor数据库。所以需要传入DishDto,但是这时的flavor不包含类别id,所以还需要从中获取类别id遍历赋值给flavor,然后更新口味表。
- 这里对于口味内容进行更改,可能存在项目减少或增多,对应的更新就会有点复杂,所以这里不管怎样,先将口味内容清除,然后再提交新的口味。
实现:
- 首先去
DishService中创建updateWithFlavor方法,然后在DishServiceImpl中重写方法
1 |
|
- 控制器方法
1 |
|
删除/启停菜品
停售/启售实现
这里单个停售/启售和批量停售/启售共用的一个方法,只是传入的id是一个还是多个,所以接收id的list
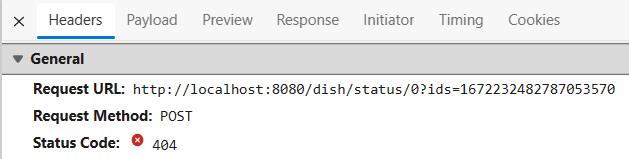
实现:参考套餐管理4.2
1 |  |
删除
类似上面,单个和批量一个方法实现

实现
1 |
|
新增套餐
前端页面与服务端的交互过程
- 页面发送ajax请求,请求服务端,获取套餐分类数据并展示到下拉框中(这个之前做过)
- 页面发送ajax请求,请求服务端,获取菜品分类数据并展示到添加菜品窗口中
- 页面发送ajax请求,请求服务端,根据菜品分类查询对应的菜品数据并展示到添加菜品窗口中
- 页面发送请求进行图片上传,请求服务端将图片保存到服务器(已完成)
- 页面发送请求进行图片下载,将上传的图片进行回显(已完成)
- 点击保存按钮,发送ajax请求,将套餐相关数据以json形式提交到服务端
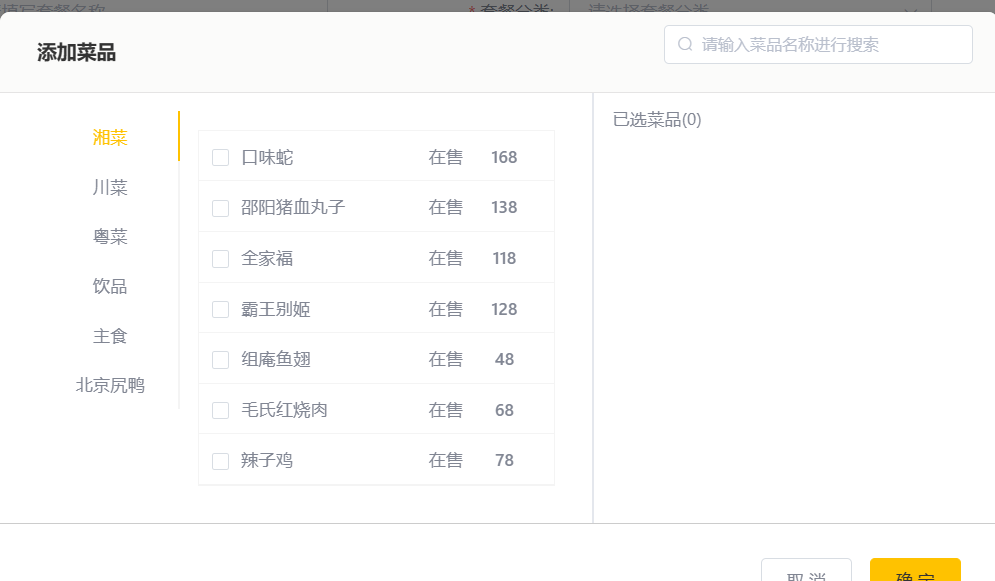
新增套餐页面:

添加菜品页面
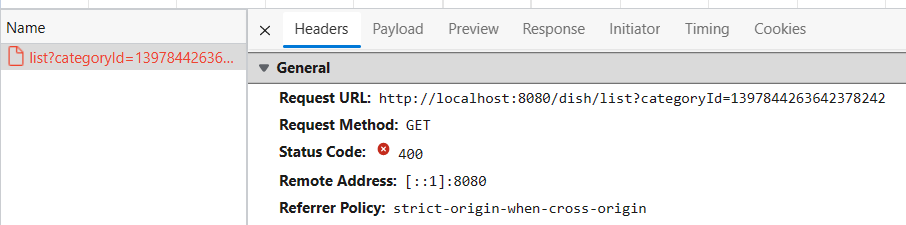
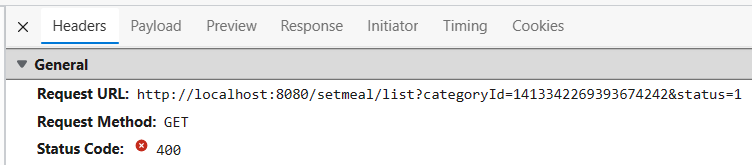
这个页面是发送的GET请求,且路径为
dish/list?categoryId=xxx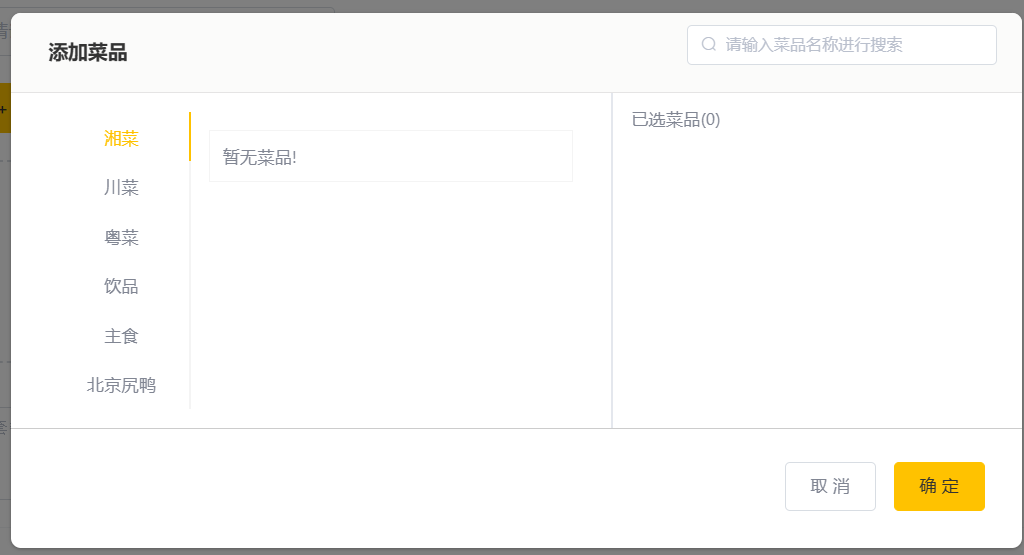
所以先去
DishController中编写对应的get方法来正确显示菜品数据
添加菜品页面
可以看出,根据类别id查找出所有该类的菜品,作为list返回给前端页面
前端
按键
1
<span v-if="dishTable.length == 0" class="addBut" @click="openAddDish"> + 添加菜品</span>
点击事件
1
2
3
4
5
6
7
8
9// 添加菜品
openAddDish() {
this.seachKey = ''
this.dialogVisible = true
//搜索条件清空,菜品重新查询,菜品类别选第一个重新查询
this.value = ''
this.keyInd = 0
this.getDishList(this.dishType[0].id)
},getDishList根据id获取菜品1
2
3
4
5
6
7
8
9
10
11
12
13
14
15
16
17
18
19
20
21// 通过套餐ID获取菜品列表分类
getDishList (id) {
queryDishList({categoryId: id}).then(res => {
if (res.code === 1) {
if (res.data.length == 0) {
this.dishAddList = []
return
}
let newArr = res.data;
newArr.forEach((n) => {
n.dishId = n.id
n.copies = 1
// n.dishCopies = 1
n.dishName = n.name
})
this.dishAddList = newArr
} else {
this.$message.error(res.msg)
}
})
},ajax请求
1
2
3
4
5
6
7
8// 查菜品列表的接口
const queryDishList = (params) => {
return $axios({
url: '/dish/list',
method: 'get',
params
})
}
后端
DishController中编写对应的get方法来正确显示菜品数据
1 |
|
效果
下拉列表
按钮
1
2
3
4
5
6 <el-button
type="primary"
@click="addSetMeal('add')"
>
+ 新建套餐
</el-button>addSetMeal1
2
3
4
5
6
7
8
9
10
11
12
13
14
15// 添加
addSetMeal (st) {
if (st === 'add'){
window.parent.menuHandle({
id: '5',
url: '/backend/page/combo/add.html',
name: '添加套餐'
},true)
} else {
window.parent.menuHandle({
id: '5',
url: '/backend/page/combo/add.html?id='+st,
name: '修改套餐'
},true)
}add方法,跳转到add页面
这里因为前面已经写过了类别自动加载的下拉列表部分
1
2
3
4
5
6
7
8
9
10// 获取套餐分类
getDishTypeList() {
getCategoryList({ type: 2, page: 1, pageSize: 1000 }).then((res) => {
if (res.code === 1) {
this.setMealList = res.data.map((obj) => ({ ...obj, idType: obj.id }))
} else {
this.$message.error(res.msg || '操作失败')
}
})
},getCategoryList发送ajax请求1
2
3
4
5
6
7
8// 获取菜品分类列表
const getCategoryList = (params) => {
return $axios({
url: '/category/list',
method: 'get',
params
})
}可以看出,这个请求我们在
CategoryController中已经处理过了,只不过前面传入的Type不一样
数据提交
url请求:
发送的数据
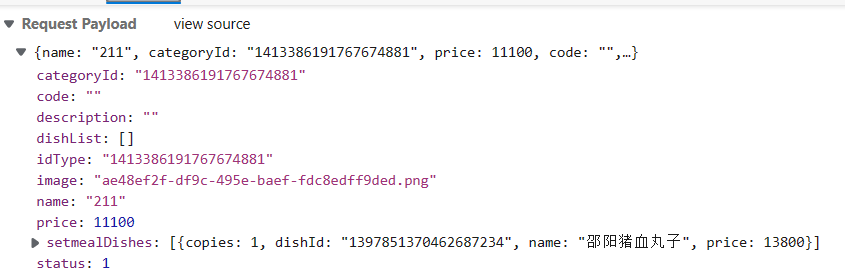
可以看出,发送的内容不光包括setmeal本身的属性,还包括了setmealDishes,类似于前面的菜品口味,这里也需要创建对应的Dto以综合两个表的数据。
准备工作
- 导入
SetmealDto到dto包
1 |
|
这里多个setmealDishes属性,用到了对应的
SetmealDish类,也需要导入到entity包下,这个类对应了数据库中的setmeal_dish表创建
SetmealDish的mapper、service、serviceImpl等,因为后续需要对其进行表数据存储
控制器方法
SetmealService
1 | public interface SetmealService extends IService<Setmeal> { |
SetmealServiceImpl
这里类比前面的菜品口味表即可实现,主要是先保存setmeal数据,然后获取套餐id,通过dto获取到套餐菜品列表,然后逐个对其套餐id进行赋值(原本没有套餐id内容),然后将使用setmealDishService对套餐菜品数据进行保存
1 |
|
可以看到,套餐表和套餐菜品表都有新增的内容,且id对应


并且展示在页面上

套餐信息分页查询
初步实现
可以看到请求url
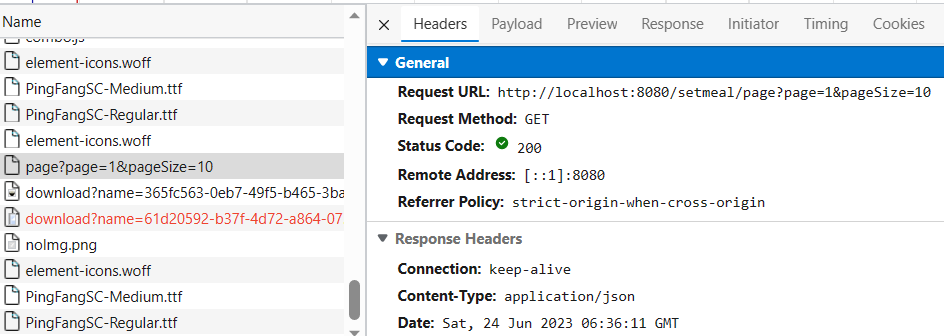
所以初步实现
1 |
|
页面展示如下
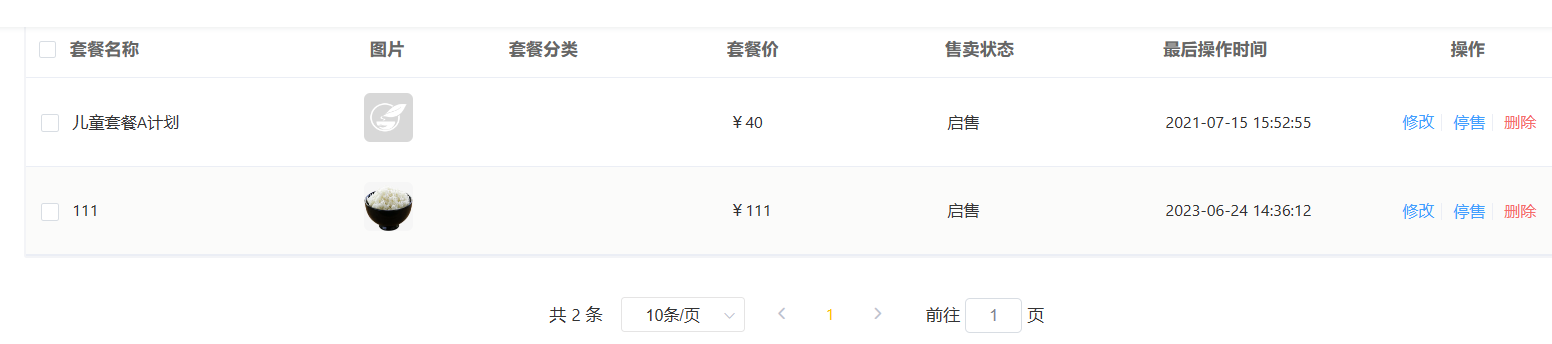
可以看出,此时套餐分类一栏没有正常显示;图片只需要将资源放置在原来设定的文件夹下即可。
查看发送的数据
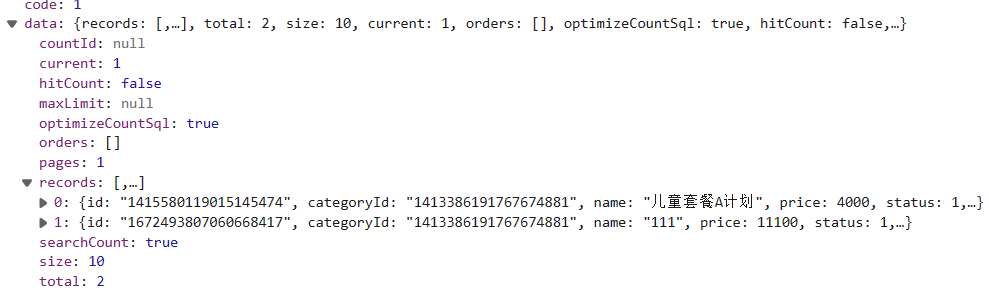
可以看出,此时传入的数据包含了类别id,但是前端需要显示的是类别name,所以后端部分需要进行一个转换,但是setmeal中并没有CategoryName属性,所以又用到了前面引入的SetmealDto类了!其中引入了categoryName,所以类比于之前的菜品管理页面,这里同理实现。
套餐分类显示
类别与13.2内容。注意需要引入CategoryService以根据类别id获取name
1 |
|
效果:

修改套餐
套餐信息回显
前端分析
- 根据id获取套餐信息
1 | async init() { |
querySetmealById
1 | // 查询详情接口 |
控制器方法
因为回显内容不仅涉及setmeal,还包括了setmealDish的内容,所以需要用到SetmealDto类进行整合,但是直接用dto接收后端数据的化setmealDish中的套餐id就会为null,所以需要专门进行迭代赋值。
SetmealService添加方法
1 | //修改套餐内容时回显套餐详情,需要联合setmeal和setmealDish两个表 |
- 实现
总的流程就是接收被修改套餐的id,然后根据id获取setmeal,拷贝给setmealDto,然后根据这个id对setmealDish进行查询,获取对应的数据,然后将这些dish数据通过dto赋值给setmealdish属性,从而获得完整的内容
1 |
|
- 控制器方法
1 |
|
套餐信息修改
类似于14.2内容
- 提交表单
1 | else { |
editSetmeal
1 | // 修改数据接口 |
删除/启停套餐
删除实现
业务分析:
- 在套餐管理列表页面点击删除按钮,可以删除对应的套餐信息
- 也可以通过复选框选择多个套餐,选择批量删除一次性删除多个套餐
注意:对于
在售中的套餐不能删除,需要先停售,然后才能删除
交互过程
在代码开发之前,需要梳理一下删除套餐时前端页面和服务器的交互过程:
删除单个套餐时,页面发送ajax请求,根据套餐id删除对应的套餐

删除多个套餐,页面发送ajax请求,根据提交的多个套餐id删除多个对应的套餐

删除单个套餐和批量删除这两种请求的地址和请求方式都是相同的,不同的则是传递的id个数,所以在服务端可以提供一个方法来统一处理。
SetmealService
1 | //删除套餐,不仅删除setmeal数据,还需要删除setmealDish数据 |
SetmealServiceImpl
1 |
|
SetmealController
1 |
|
此时,删除并不能实现,因为默认所有菜品处于启售状态,停售功能还没有实现。
注意:在
SetmealServiceImpl类上方添加事务注解@Transactional,因为设计了多个表的数据删除
停售/启售实现
停售类似前面的删除,也是分为单个停售和批量停售,实现类似上述。
单个停售

批量停售

也是使用一个统一方法来处理,传入参数是列表封装的ids
前端
- 前端传来一个status(这里不同于套餐的属性status,这是前端的一个参数,如果)和待修改套餐的ids
1 | <el-button |
如果套餐status为0即停售,则按键显示启售;反之同理
- 点击事件
1 | //状态更改 |
这里将参数传递给
setmealStatusByStatus
- 传递ajax请求
1 | // 批量起售禁售 |
可以看出,路径上传递status,然后ids以拼接参数传递
后端
SetmealController
1 |
|
UpdateWrapper
在上面引入了UpdateWrapper,可以通过set方法去修改数据属性,然后使用Service中update方法接收UpdateWrapper实现数据的更新
手机/邮件验证码
需求分析
为了方便用户登录,移动端通常都会提供通过手机验证码登录的功能(可以平替成邮箱验证码)
- 手机(邮箱)验证码登录的优点:
- 方便快捷,无需注册,直接登录
- 使用短信验证码作为登录凭证,无需记忆密码
- 安全
- 登录流程: 登录页面(front/page/login.html)输入手机号(邮箱) > 获取验证码 > 输入验证码 > 点击登录 > 登录成功
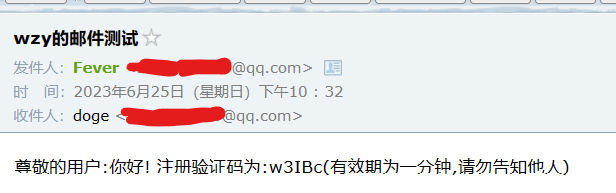
因为短信验证码服务收费,所以这里参考[这篇文章](瑞吉外卖 | Kyle’s Blog (cyborg2077.github.io))使用邮箱验证码。具体操作需要开启POP3/STMP服务,获取一个16位的授权码
设置->账户->开启服务
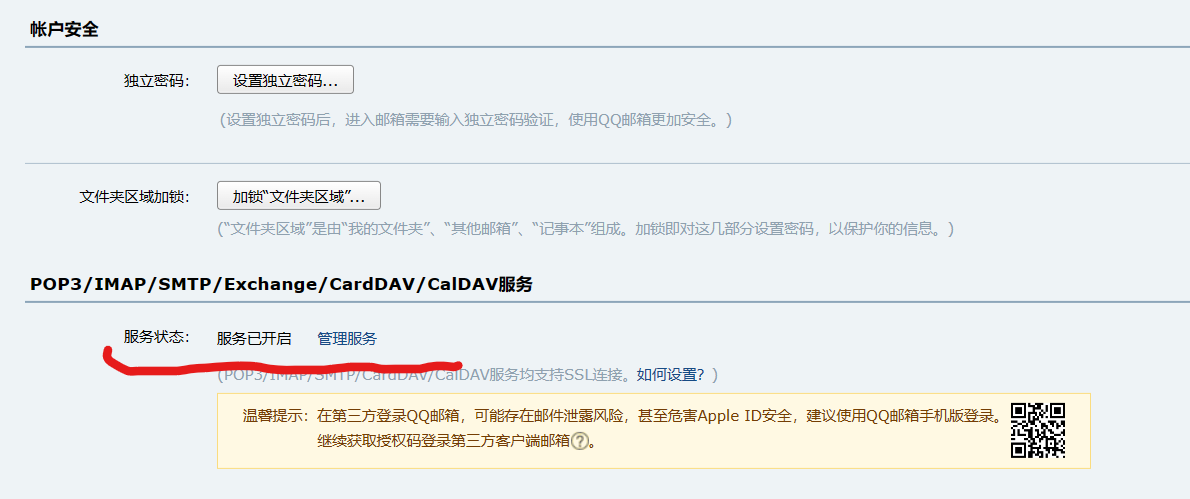
获取一个16位授权码:
pjgratlrjjcyecfb
数据模型
通过手机号(邮箱)验证码登陆时,涉及的表为user表,结构如下:
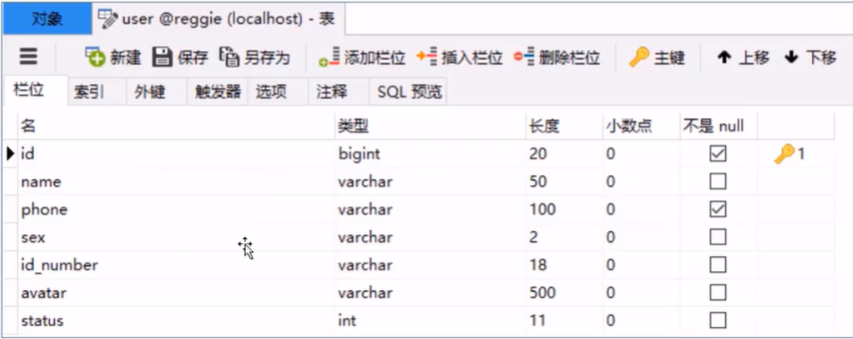
- 手机号(邮箱)是区分不同用户的标识,在用户登录的时候判断所输入的手机号(邮箱)是否存储在表中
- 如果不在表中,说明该用户为一个新的用户,将该用户自动保在user表中
准备工作
- 导入实体类User.java
1 |
|
创建对应UserMapper、UserService、UserServiceImpl、UserController
导入maven坐标依赖
1 | <!-- https://mvnrepository.com/artifact/javax.activation/activation --> |
- 创建
utils包,存放信息/邮件验证码发送工具类、随机生成验证码工具
MainUtils
1 | import java.util.Arrays; |
测试结果:
查看前端页面
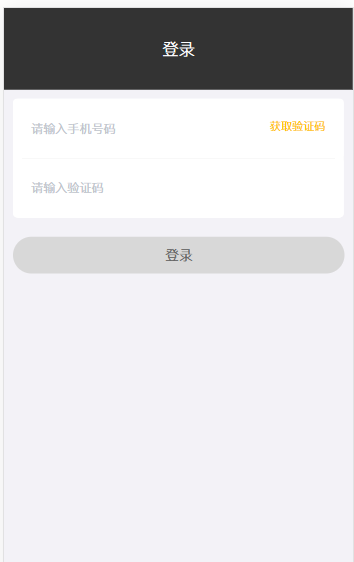
front/page/login.html直接访问效果如下:

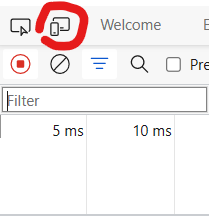
这是因为页面由h5编写,查看需要使用浏览器的手机模式:打开F12,点击如下按钮切换为手机模式
手机模式显示如下:
修改拦截器
对用户登录操作放行
1
2
3
4
5
6
7
8
9
10
11//定义不需要处理的请求
String[] urls = new String[]{
"/employee/login",
"/employee/logout",
"/backend/**", //静态资源
"/front/**",
//对用户登陆操作放行
"/user/login",
"/user/sendMsg"
};判断用户是否登录,已登录就直接放行
1
2
3
4
5
6
7
8//4.2 判断用户是否登录
if(request.getSession().getAttribute("user") != null){
log.info("用户已登录,用户id为:{}",request.getSession().getAttribute("user"));
Long userId = (Long)request.getSession().getAttribute("user");
BaseContext.setCurrentId(userId);
filterChain.doFilter(request,response);
return;
}
验证码发送
将
login.html中判断手机号的正则表达式换成判断邮箱的正则表达式:^\w+([-+.]\w+)*@\w+([-.]\w+)*\.\w+([-.]\w+)*$
注意:使用day5下的前端资源替换front前端资源,并且清除浏览器缓存,然后再访问登录页面
- 点击获取验证发就会发送
sendMsg的ajax请求

- 处理
sendMsg请求
1 |
|
然后点击获取验证码,就会往邮箱发送验证码,且可以查看session中保存的验证码
- 输入验证码后,点击登录,发送如下ajax请求,并且携带请求参数
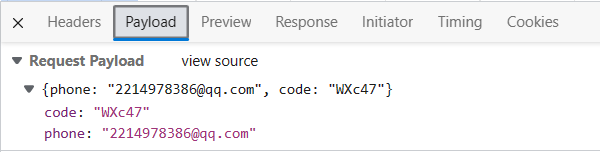
- 处理
login请求
可以直接用一个map接收请求参数;或者像以前一样创建UserDto,新增code属性
1 |
|
可以接收到请求参数
1 | INFO 10716 --- [nio-8080-exec-5] com.wzy.controller.UserController : {phone=2214978386@qq.com, code=tH4W5} |
继续优化
1 |
|
其中标注注意的部分:在登录成功后需要将用户信息存入session,因为之前的过滤器中设定了相应地方法,防止直接输连接进入主页面,所以添加了用户登录判断部分,所以登陆成功后需要将信息存入session中
- 此时点击登录,进入主页面
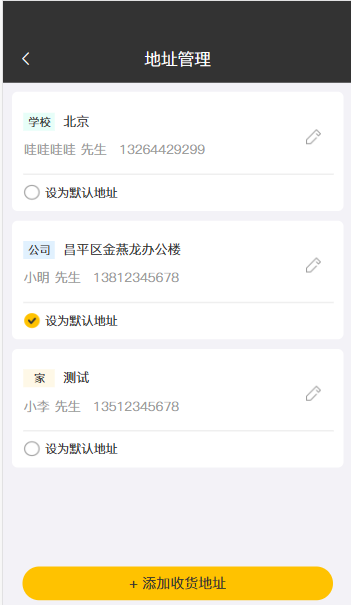
地址簿
需求分析
- 地址簿,指的是移动端消费者用户的地址信息(外卖快递的收货地址)
- 用户登录成功后可以维护自己的地址信息(自己修改删除新增等)
- 同一个用户可以有多个地址信息,但是只能有一个默认地址。(有默认地址的话会很方便)
地址簿数据库
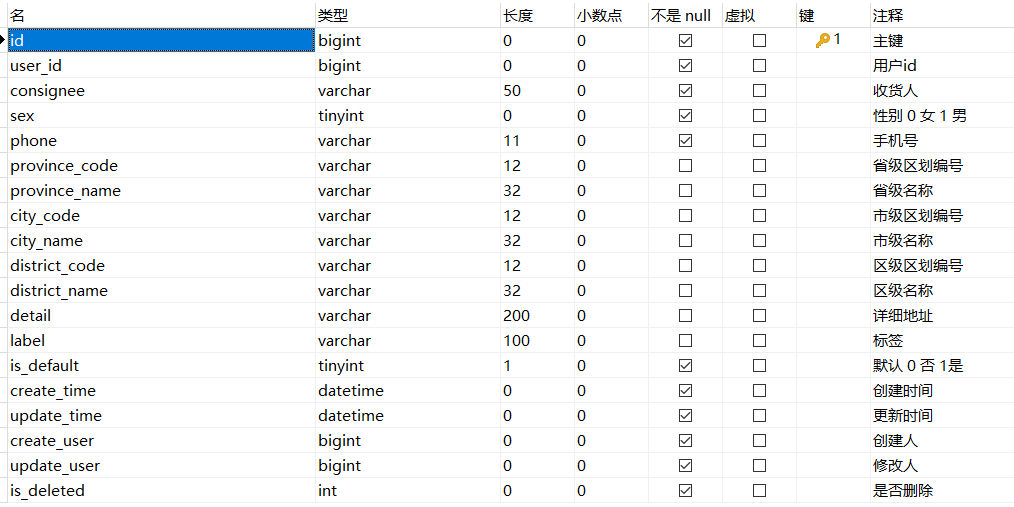
注意:因为前面使用的邮箱验证,所以这里的phone字段长度11有些不够了,所以需要修改其长度。我这里修改为20
完成以下准备:
- 导入实体类
AddressBook - 创建Mapper、Service、ServiceImpl、Controller
完善地址管理页面
- 初始进入地址管理页面
front/page/address.html,并发送请求
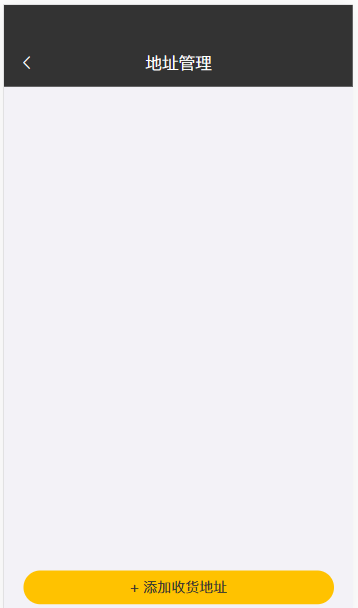
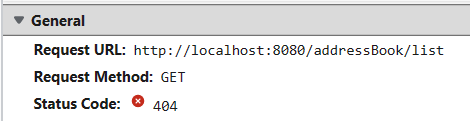
- 完善
list请求
这里的需求是查找登录用户的所有地址并显示
1 |
|
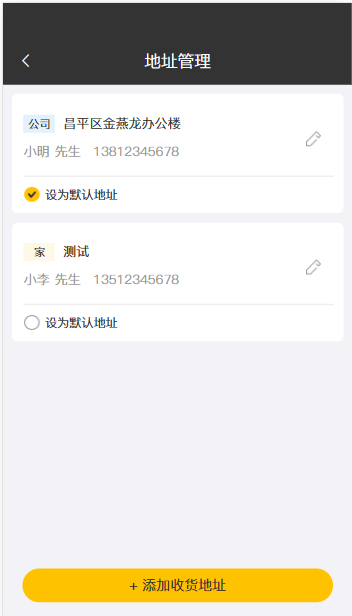
新增收货地址
- 点击按键后跳转新增页面,填好表单,提交数据时,前端发送如下请求,并且携带了对应填入的参数
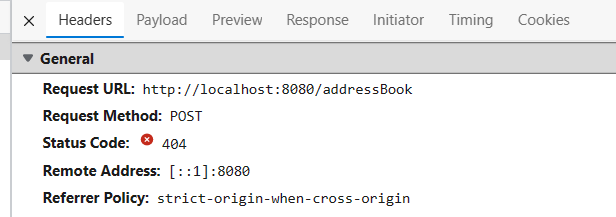
- 实现该请求
1 |
|
默认地址设置
- 默认地址,按理说数据库中,有且仅有一条数据为默认地址,也就是
is_default字段为1 - 如何保证整个表中的
is_default字段只有一条为1- 每次设置默认地址的时候,将当前用户所有地址的
is_default字段设为0,随后将当前地址的is_default字段设为1
- 每次设置默认地址的时候,将当前用户所有地址的
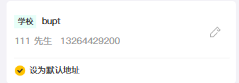
- 点击设为默认地址按钮,发送如下请求
触发点击事件方法,判断是否存在id
1 | async setDefaultAddress(item){ |
对应的api方法发送ajax请求
1 | //设置默认地址 |
- 实现
default请求
1 |
|

此时点击设为默认地址,原来的默认地址就会取消勾选,并且被勾选的会排在第一个
修改/删除地址
点击修改地址,首先会跳转到地址编辑页面,并发送如下请求:
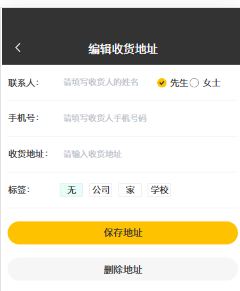
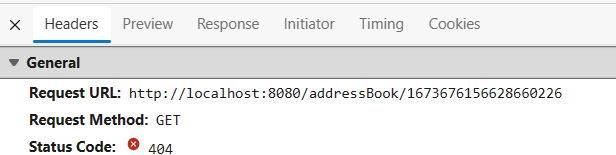
所以首先要根据地址的id将信息回显在地址编辑页面
地址回显
地址编辑页面
1 | async initData(){ |
发送ajax请求
1 | //查询单个地址 |
控制器方法:
1 |
|

编辑地址
修改地址后点击保存,发送如下请求:同时携带数据

前端的saveAddress方法中的判断:
此时是编辑,所以会传来id,所以调用更新地址api
1 | if(this.id){ |
ajax请求
1 | //修改地址 |
后端实现:
1 |
|
删除地址
点击删除地址:
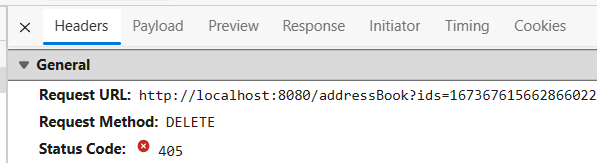
实现
1 |
|
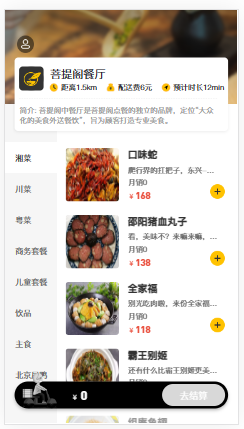
菜品展示
需求分析:
- 用户登陆成功之后,跳转到菜品页面,根据菜品分类来展示菜品和套餐
- 如果菜品设置了口味信息,则需要展示选择规格按钮,否则只展示+按钮(这部分是前端实现的)
前端分析(Promise异步请求)
页面(front/index.html)发送ajax请求,获取分类数据(菜品分类和套餐分类)
进入首页后,会发送两个ajax请求:分别是分类请求和购物车请求
index页面信息
1 | //初始化数据 |
可以看出,发送两个请求,分别是
categoryListApi()和cartListApi()
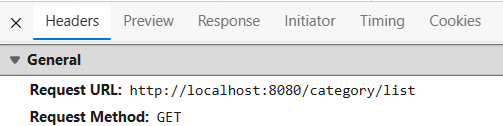
categoryListApi()
1 | //获取所有的菜品分类 |
可以看出发送类别的list请求,但这个请求前面已经写过了,之所以没有正常显示是因为:
Promise.all在处理多个异步请求时,需要等待绑定的每个ajax请求返回数据以后才能正常显示
虽然categoryListApi可以正常返回数据,但是cartListApi并没有写
cartListApi获取购物车商品信息
1 | //获取购物车内商品的集合 |
购物车相关功能还没写,所以这里我们用一个写死了的json数据(
cartData.json)骗骗它。将url换成我们注释掉的那个就好了
cartData.json
1 | {"code":1,"msg":null,"data":[],"map":{}} |
此时重启服务器,可以看到菜品已经加载出来
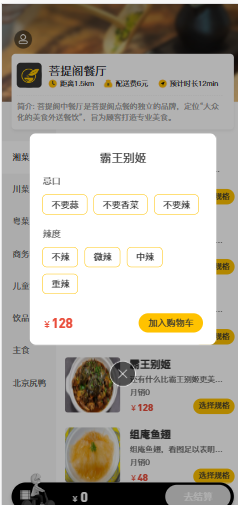
目前存在一个问题,因为菜品是有口味数据的,所以选菜按钮不该是一个+,而应该是选择规格
1 | <div class="divTypes" v-if="detailsDialog.item.flavors && detailsDialog.item.flavors.length > 0 && !detailsDialog.item.number " @click ="chooseFlavorClick(detailsDialog.item)">选择规格</div> |
但是代码中实际上写了这个按钮,但是选择规格按钮,是根据服务端返回数据中是否有flavors字段来决定的,但我们返回的是一个
List<Dish>,其中并没有flavors属性,所以我们需要修改前面的方法返回值为DishDto,DishDto继承了Dish,且新增了flavors属性
选择规格
前端请求
点击具体分类时,页面会发送请求,查询对应的dish
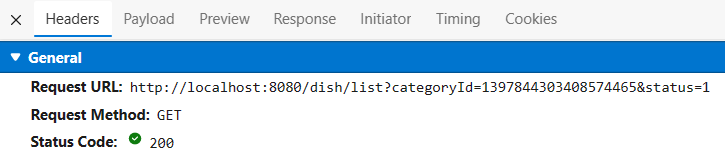
- 获取菜品数据,可以看出返回数据类型是list,其中类型是dish
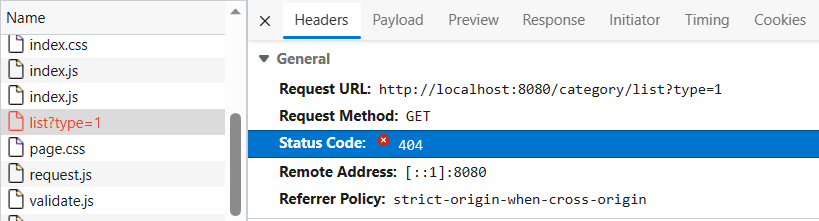
1 | //获取菜品数据 |
dishListApi获取菜品信息,传入的数据是data,并且参数封装为json格式,控制器参数可以使用dish类
1 | //获取菜品分类对应的菜品 |
后端实现
像前面分析的一样,因为之前写的dish的list方法的返回为dish,不包含flavor属性,所以选择规格这一按钮都不显示
- 修改前
1 |
|
- 修改后
实现思路,类似前面的13.2 菜品分类内容显示和16.2 套餐分类显示。需要将返回的类型修改为DishDto,主要涉及对象内容的拷贝,根据菜品id在口味表中查询对应的口味,封装在DishDto的flavor属性上。
1 |
|
显示效果
套餐展示
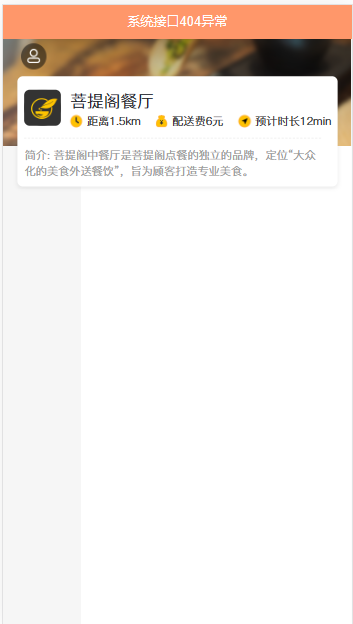
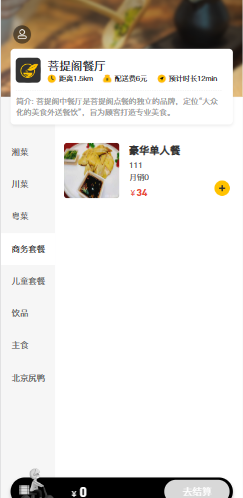
展示
之前处理的是category的请求,套餐的请求还未处理,此时点击儿童/商务套餐,会发送如下请求
这部分内容比较简单,在SetmealController中实现
什么时候用
@RequestBody? 首先用于接收请求体的数据,因为get方法没有请求体,所以get一定不会标注,通常是post方法
1 |
|
点击图片查看详情
前端分析
点击套餐图片后发送请求;

点击图片会触发
1 | <div> |
dishDetails()
1 | async dishDetails(item){ |
setMealDishDetailsApi
1 | //获取套餐的全部菜品 |
后端实现
初步实现
从前面可以看出,需要显示的数据包括:图片、菜品名称、菜品描述即可,这些数据在dish菜品中有,但给的是setmeal的id,所以需要根据setmealId从setmealDish表中查出对应的菜品,然后进而获取对应dish的详细信息,封装在list中
1 |
|
初步结果:
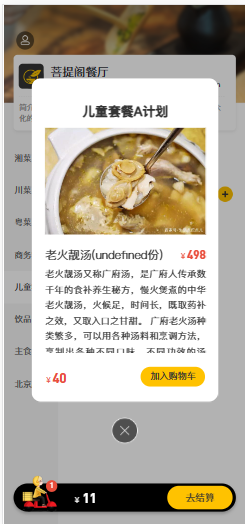
可以看到,菜品名称后面多了个undefined份,说明份数字段读取失败。经过查看,发现这里的属性是
copies,该字段属于setmealDish表,dish中不含有这个字段,所以之前的dishDto又派上了用场,其中包含了copies属性
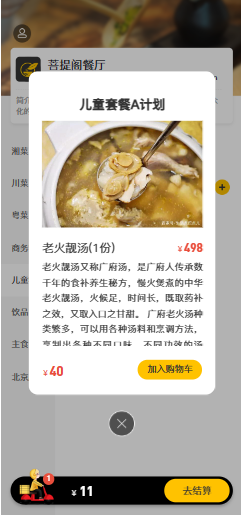
优化后的版本:
1 |
|
效果:
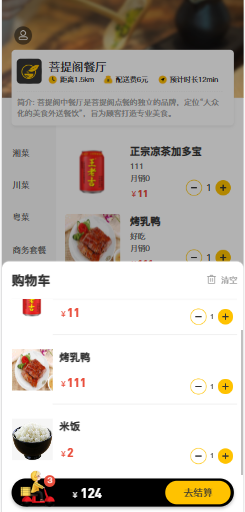
购物车
- 移动端用户可以将菜品/套餐添加到购物车
- 对于菜品来说,如果设置了口味信息,则需要选择规格后才能加入购物车(前端实现)
- 对于套餐来说,可以直接点击当前套餐加入购物车
- 在购物车中可以修改菜品/套餐的数量,也可以清空购物车
准备工作:
导入ShoppingCart实体类,实现mapper、service、serviceImpl、controller
加入购物车
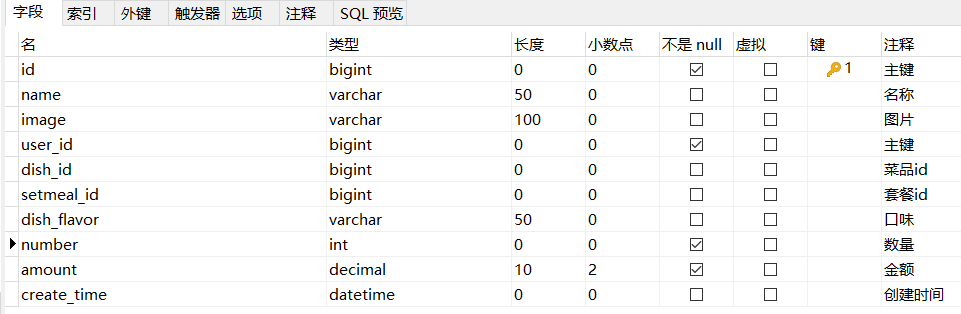
其中number默认为1
请求分析
首先选择规格,这里必须选择才能加入购物车(前端实现):
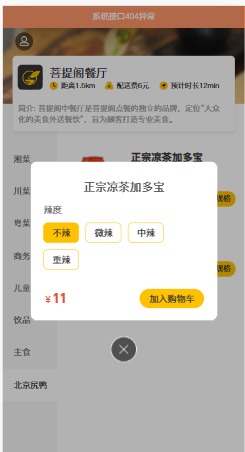
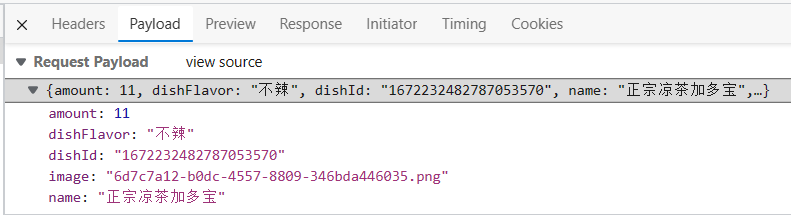
然后可以看到发送如下请求及携带参数:
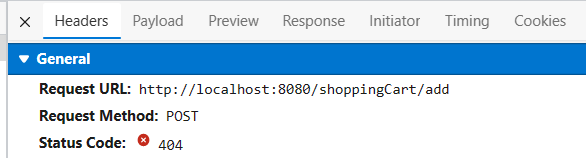
后端实现
初步实现
1 |
|
后端接收:
1 | INFO 2084 --- [nio-8080-exec-6] c.wzy.controller.ShoppingCartController : 加入购物车的数据:ShoppingCart(id=null, name=正宗凉茶加多宝, userId=null, dishId=1672232482787053570, setmealId=null, dishFlavor=中辣, number=null, amount=11, image=6d7c7a12-b0dc-4557-8809-346bda446035.png, createTime=null) |
可以看到,包含了菜品的信息,但是用户id、添加数量、菜品或者套餐的判断这些内容并没有实现,仍需进一步完善
进一步完善:
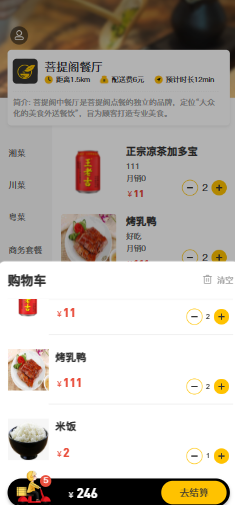
点了两个菜,不需要存储两条数据,只需要对属性number增加即可
1 |
|
因为还没有实现购物车显示功能,所以需要到数据库中查看效果:(注意创建时间在新增时添加)

查看购物车
之前为了不报错,我们将查看购物车的地址换成了一个死数据。那现在我们要做的就是换成真数据
cartListApi(): 获取购物车商品信息
1 | //获取购物车内商品的集合 |
在
front/index.html中,找到vue的method,其中包含initDate,其中通过异步请求实现类别加载和购物车加载的功能
实现请求:
1 |
|
效果:添加一次后再添加就会显示该菜品已存在,说明前面的add功能有bug
经过代码查看,发现是前面add方法L30处书写错误
第一个之所以错误是因为save是根据id判断的,因为id已经存在,所以不能保存,而第二个只是更新数据
1 | shoppingCartService.save(cartServiceOne); |
效果:此时可以点多个
==注意==:此时减的功能并没实现,后续需要完善
去掉某个商品
也就是前面说的减号功能,点击减号触发请求以及参数
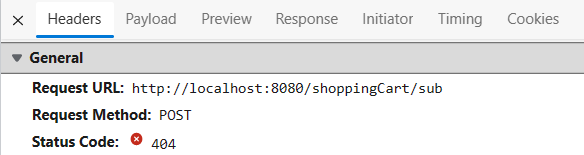
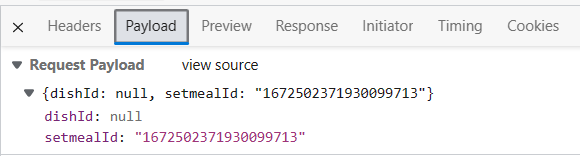
功能实现:
主要思路:因为前端只传来dishId或者setmealId,所以用ShoppingCart接收参数,然后根据id去获取对应的shoppingCart,然后根据id类型不同获取实例,然后判断数量进行减功能
1 |  |
清空购物车
点击购物车的清空图标,发送如下请求:
实现很简单,只需要将当前用户的所有菜品、套餐全部delete即可
1 |
|
用户下单
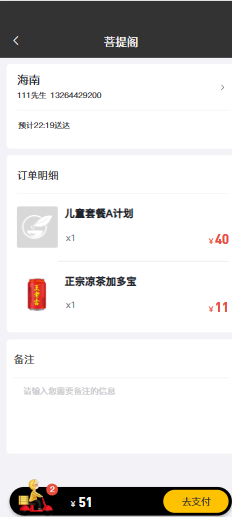
移动端用户将菜品或者套餐加入购物车后,可以点击购物车中的去结算按钮,页面跳转到订单确认页面,点击去支付按钮,完成下单操作
- 在购物车中点击去结算按钮,页面跳转到订单确认页面
- 在订单确认页面中,发送ajax请求,请求服务端,获取当前登录用户的默认地址
- 在订单确认页面,发送ajax请求,请求服务端,获取当前登录用户的购物车数据
- 在订单确认页面点击去支付按钮,发送ajax请求,请求服务端,完成下单操作
准备工作
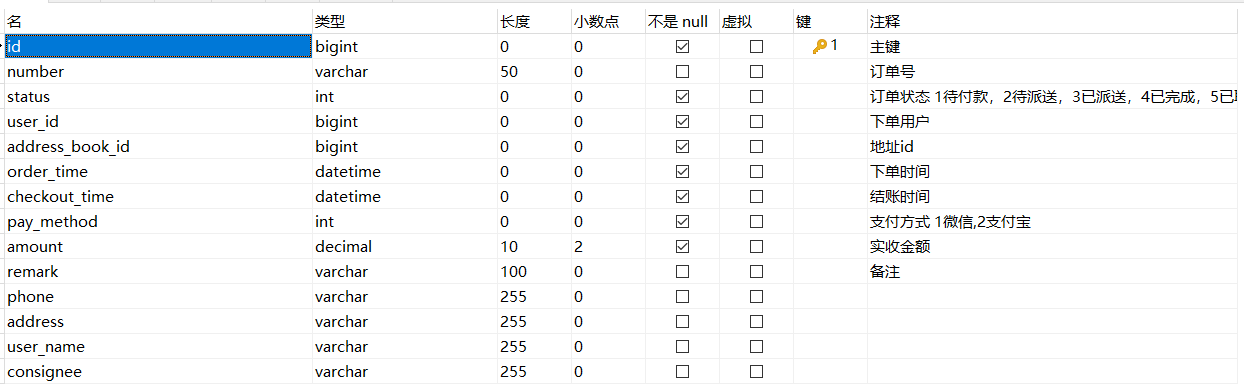
用户下单业务对应的数据表为orders表和order_detail表
orders
更多的是用户的信息:地址、订单号、下单时间等
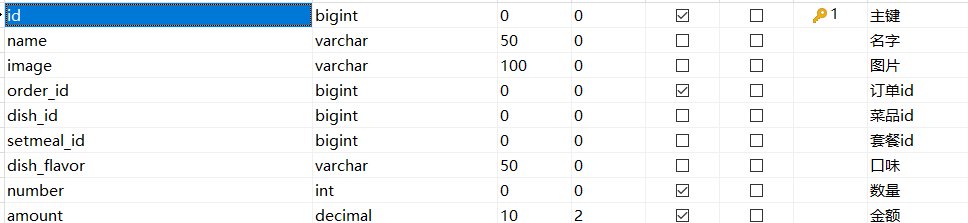
order_detail
与点单的菜品更相关
导入这两个实体类,然后分别完成这两个表的mapper、service、serviceImpl、controller
默认地址加载
首先点击前往去结算,触发点击事件,然后页面跳转
1 | //跳转到去结算界面 |
进入该页面,前端首先发送如下请求:
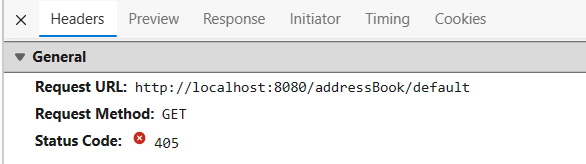
页面跳转到确认订单页面,发送ajax请求,用于获取用户的默认地址,但是请求失败,服务端没有对应的映射
在AddressBookController中编写对应方法
1 |
|
效果:
结算
后端实现
此时点击去支付,点击事件触发
1 | async goToPaySuccess(){ |
则前端发送如下请求:
具体的submit方法放在OrderService写,OrderController调用写好的submit方法,可以看出接收order参数
OrderService
1 | public interface OrdersService extends IService<Orders> { |
OrderServiceImpl
1 |
|
OrderController
1 |
|
编写具体的submit方法的逻辑代码,我们先来分析一下下单功能,都需要做什么事情
- 获取当前用户id
- 根据用户id查询其购物车数据
- 根据查询到的购物车数据,对订单表插入数据(1条)
- 根据查询到的购物车数据,对订单明细表插入数据(多条)
- 清空购物车数据
OrdersServiceImpl中完整的submit实现
1 |
|
IdWorker:mybatis-plus中引入的分布式ID生成框架idworker,进一步增强实现生成分布式唯一IDAtomicInteger:原子操作类,多线程条件下的同步操作BigDecimal:用来对超过16位有效位的数进行精确的运算,不会丢失精度
错误解决
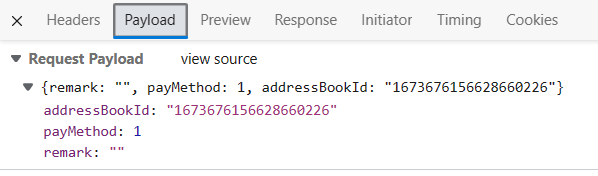
此时点击结算,发现报错:地址为空
说明Impl中设置的判定条件符合,但是前端的确传来了addressBookId,但是发现addressBook为空

打印addressBook的内容
1 | INFO 22936 --- [nio-8080-exec-5] com.wzy.service.impl.OrdersServiceImpl : 下单地址数据:null |
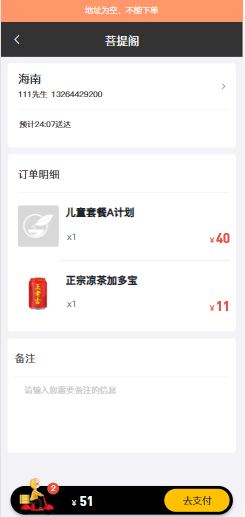
说明没有接收到前端传来的参数,经过查看OrdersController后,发现传入的形参orders没有使用@RequestBody注解!!!
1 |
|
成功!
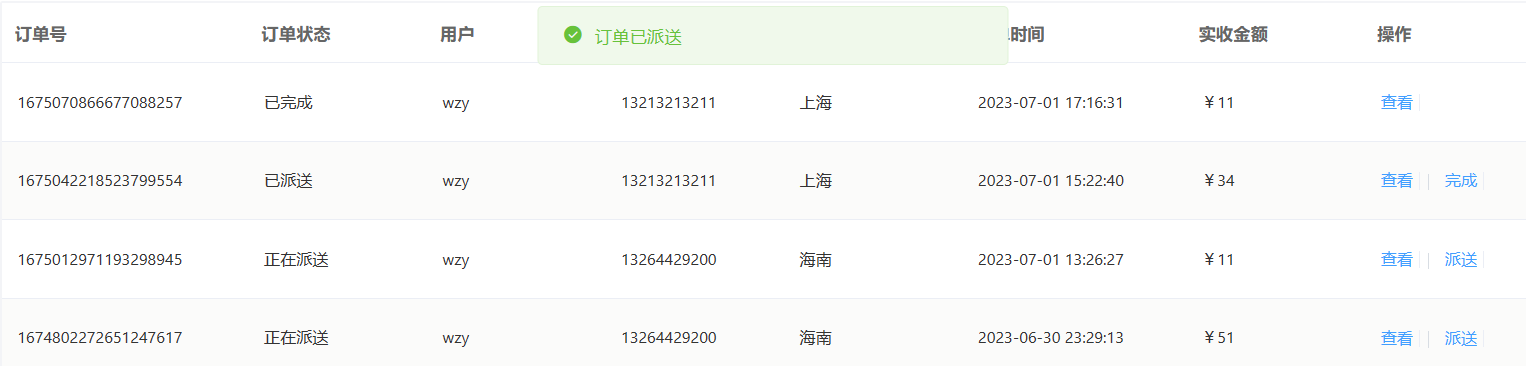
历史订单
- 访问个人中心的时候,会自动发送请求:
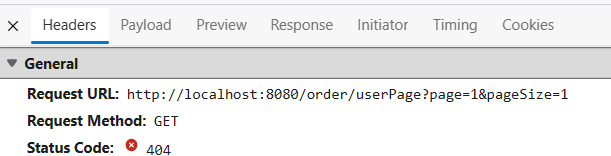
通过分页查询获取最新订单信息
- 点击历史订单,发送如下请求:
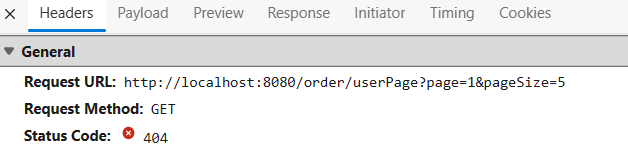
可以看出此时分页查询每次查询5条数据,与上述有所区别
因为二者请求一致,区别在于前端传来的分页查询数据,所以后端使用一个方法就可以实现
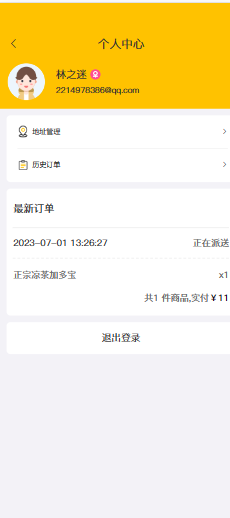
通过前端页面内容,可以看出需要展示的内容包括下单时间、下单状态(正在派送、已派送、已完成、已取消)、orderDetails、订单金额、菜品数量。可以看出,这些内容不仅包含在orders表中,也包含了orderDeatils表。所以这里就需要用到DTO了
- 导入OrderDto
1 |
|
- 实现
自动注入
OrderDetailService
1 |
|
以上涉及Dto内容的实现都很相似,多练!
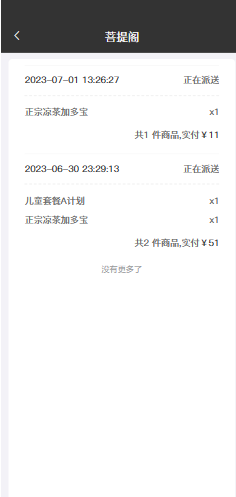
效果:分别为最新订单和历史订单
登出
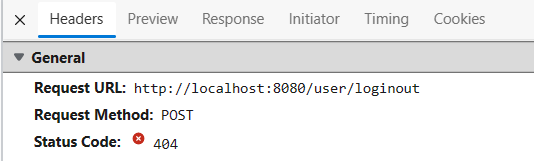
点击个人页面中的退出登录,发送如下请求:
点击事件
1 | async toPageLogin(){ |
发送ajax请求
1 | function loginoutApi() { |
代码实现:
因为前面登录是把用户id保存在了session中,所以登出只需要清除即可
2
session.setAttribute("user",user.getId());
1 |
|
清除后页面自动跳转到登录页面
订单明细
分页查询

初步实现
1 |
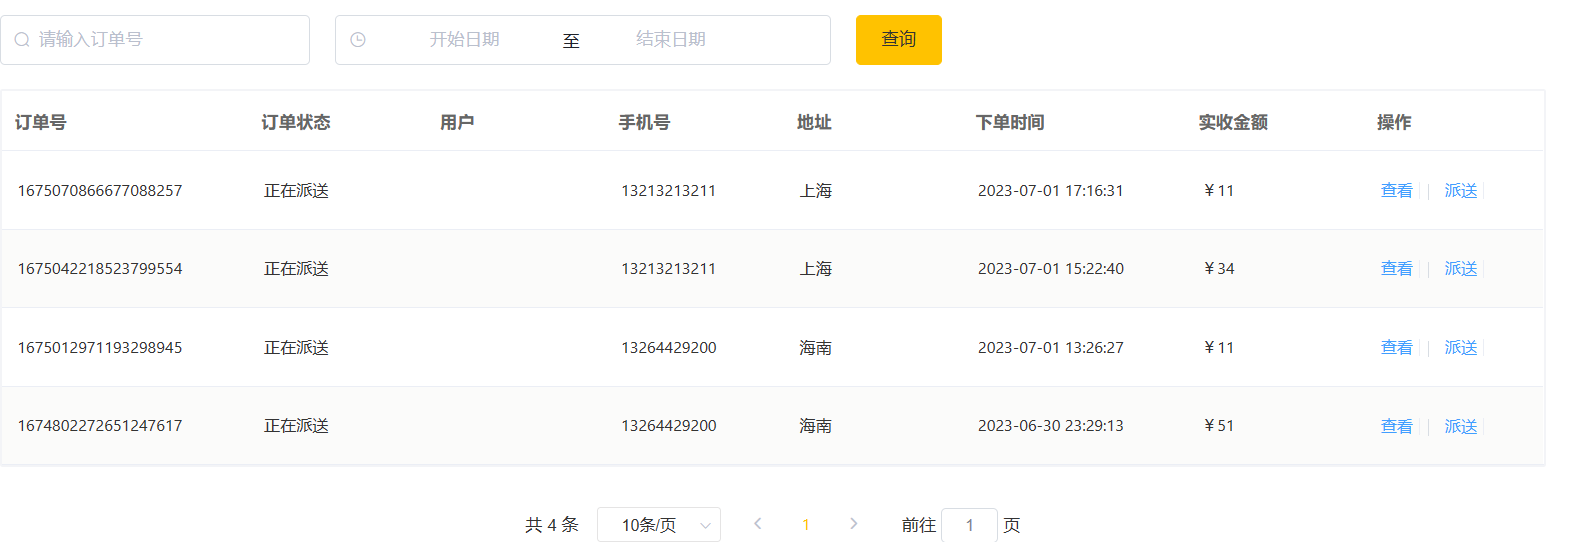
|
效果如下,发现用户名字不显示,这是因为orders表中只有userId,没有userName,这就用到了OrdersDto
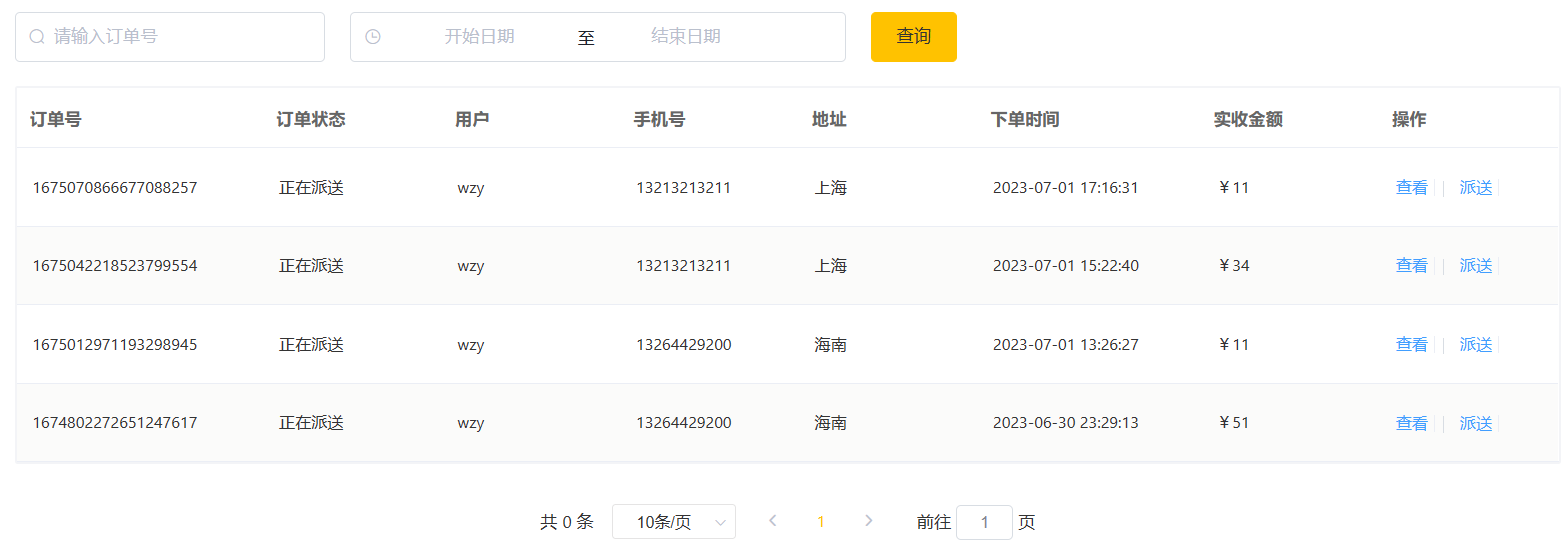
优化版本
用到OrderDto,首先copy属性,然后根据order的userId到user表中查询uerName,然后赋值给orderDto
1 |
|
注意:在这个过程中,发现了一个问题,就是前端登录用户注册后没有给默认name,后续需要优化
条件查询
写到这里发现忽略了上面的条件查询。。。
输入订单号并且选择下单时间区间,发送请求:

前端内容:
1 | async init () { |
getOrderDetailPage发送ajax请求,传递五个参数
后端实现:
注意:order中的下单时间类型是
LocalDateTime,而这里我们接收前端的条件查询是string,二者可以直接比较大小吗?首先可以通过
String.valueOf进行转换
1 |
|

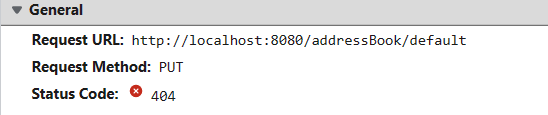
修改订单状态
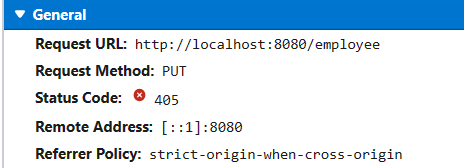
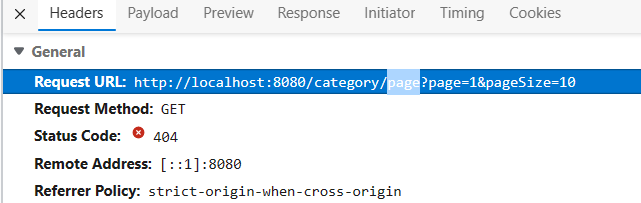
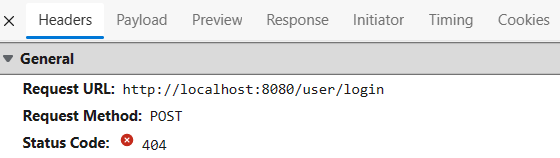
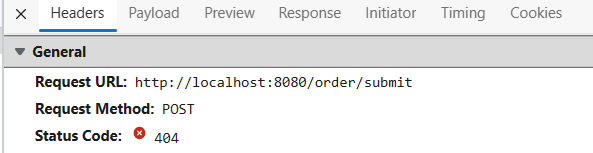
点击派送按钮,发送如下请求和请求参数
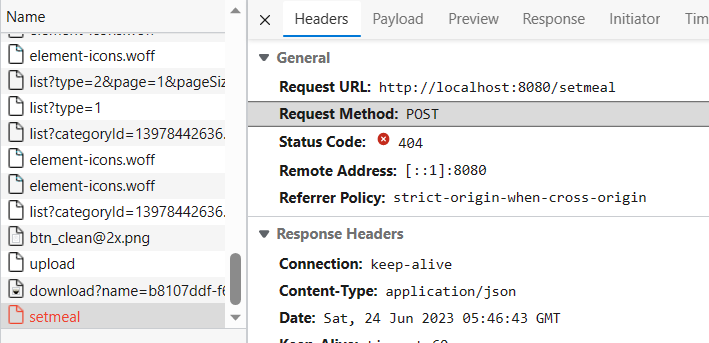
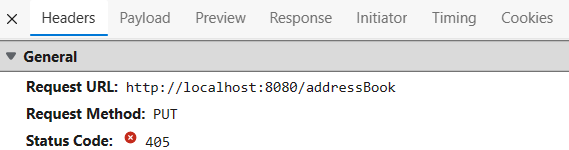
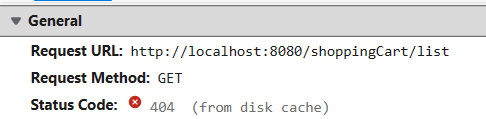
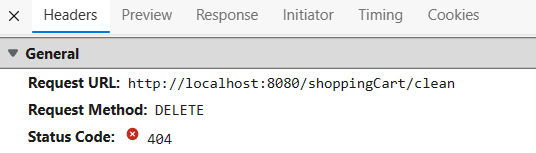
Request URL: http://localhost:8080/order
Request Method: PUT
Status Code: 404
1 | {"status": 3, "id": "1675070866677088257"} |
传来当前状态status和订单id。这个status是order表中的一个字段,默认是2即正在派送
请求分析
根据status作为条件显示两种按钮
1 | <el-divider v-if="row.status === 2" direction="vertical"></el-divider> |
四种不同状态
1 | switch(row.status){ |
cancelOrDeliveryOrComplete()点击事件
1 | // 取消,派送,完成 |
editOrderDetail()发送ajax请求。这里传递的参数就是status和id
1 | // 取消,派送,完成接口 |
后端实现
根据上面的分析,我们只需要对status字段进行修改即可
1 |
|
实现效果: